Category: Pinoy Vegetable Recipes

  • How to Make a Tasty Mung Bean and Dried Shrimp Dish – Easy Step‑by‑Step Tutorial

    How to Make a Tasty Mung Bean and Dried Shrimp Dish – Easy Step‑by‑Step Tutorial

    Soaking mung beans softens them and improves digestibility, while sautéing dried shrimp with aromatics unlocks deep umami flavor. Finish with fresh herbs, chili oil, lime, and peanuts for a burst of brightness.

    Key Takeaways

    • Soak mung beans 2–4 hours to soften, reduce cooking time, and aid digestion.
    • Cook beans until tender but still firm for the best mouthfeel.
    • Sauté dried shrimp with onion, garlic, and tomato to intensify seafood richness.
    • Garnish with green onions, fried garlic, chili oil, lime juice, and peanuts for texture and zing.

    Ingredients You’ll Need

    • 1 cup mung beans (green gram)
    • ½ cup dried shrimp (peeled)
    • 2 cups water (plus extra for soaking)
    • 2 tbsp cooking oil
    • 1 small onion, diced
    • 3 cloves garlic, minced
    • 1 medium tomato, chopped
    • 1 tbsp fish sauce
    • ½ tsp ground black pepper
    • Salt to taste
    • Optional garnish: chopped green onions, fried garlic bits, roasted peanuts, chili oil, lime or calamansi wedges

    This dish is a staple in Filipino home cooking, prized for its simplicity and hearty flavor.

    Preparing the Mung Beans

    Soaking Mung Beans

    Rinse the beans, discard any stones, and soak in cool water for 2–4 hours (or overnight). Soaking softens the beans, cuts cooking time by half, and reduces the gas‑producing compounds that can cause discomfort.

    Draining Water

    After soaking, pour the beans into a colander and rinse under running water. This removes residual salt and any remaining impurities.

    Cooking Mung Beans

    Place the drained beans in a pot, add 2 cups fresh water, and bring to a boil. Reduce to a simmer, cover, and cook 20–25 minutes, or until the beans are tender but still hold their shape. Add a pinch of salt halfway through.

    Cooking the Dried Shrimp

    Heat 2 tbsp oil over medium heat. Add the dried shrimp and sauté for 1 minute to release aroma. Then stir in the onion, garlic, and tomato. Cook until the onion turns translucent and the tomato softens, about 3 minutes.

    Step Action
    1 Heat oil; add dried shrimp.
    2 Sauté onion until fragrant.
    3 Add garlic and tomato; cook 3 min.

    Combining the Ingredients

    Stir the cooked mung beans into the shrimp mixture. Add fish sauce, black pepper, and adjust salt if needed. Let everything simmer together for 5 minutes so the flavors meld.

    Seasoning the Dish

    Taste and fine‑tune the seasoning. A splash of lime or calamansi juice brightens the umami, while a drizzle of chili oil adds gentle heat.

    Serving Suggestions and Garnishes

    • Serve hot with steamed white rice.
    • Top with chopped green onions, fried garlic bits, and roasted peanuts.
    • Finish with a drizzle of chili oil and a wedge of lime or calamansi.
    Garnish Flavor Boost
    Green onions Fresh, mild onion bite
    Fried garlic Crispy, aromatic crunch
    Roasted peanuts Nutty texture
    Chili oil Subtle heat
    Lime/calamansi Bright acidity

    Can I Use Mung Beans and Dried Shrimp in Relyenong Talong Stuffed With Tuna Dish?

    Yes! Adding mung beans and dried shrimp to Relyenong Talong stuffed with tuna deepens the umami profile and gives the dish extra body. Mix a small portion of cooked beans and rehydrated shrimp into the tuna filling for a tasty twist.

    Tips for a Flavorful Dish

    • Rehydrate dried shrimp in warm water for 15‑20 minutes to soften and reduce excess salt.
    • Use a splash of fish sauce early, then finish with lime juice for layered seasoning.
    • Add a handful of fresh spinach or kale in the last 2 minutes for color and nutrients.
    • For crunch, sprinkle crushed pork rind or toasted rice flakes just before serving.

    Ingredient Pairing Tips

    Mung beans bring a subtle sweetness that balances the briny, oceanic taste of dried shrimp. Pair them with bright aromatics (garlic, onion, tomato) and a touch of acidity for a harmonious dish.

    Seasoning for Enhancement

    A classic Filipino blend of fish sauce and black pepper creates depth, while optional herbs like cilantro or Thai basil add freshness. Adjust each element to suit your palate.

    Seasoning/Ingredient Role
    Fish sauce Boosts umami
    Black pepper Subtle heat
    Spinach Color, vitamins
    Lime/calamansi Bright acidity
    Pork rind Crispy texture

    Nutrition Benefits

    Mung beans are high in protein, fiber, and antioxidants, supporting heart health and digestion. Dried shrimp provide lean protein, calcium, and iodine, which aid thyroid function. Together they create a balanced, nutrient‑dense meal.

    Frequently Asked Questions

    Should I soak dried shrimp before cooking?

    Yes. Soaking 15‑20 minutes in warm water rehydrates the shrimp, softens the texture, and reduces excess salt.

    Can I substitute fresh shrimp for dried shrimp?

    Fresh shrimp can be used, but you’ll need less salt and a shorter cooking time. Add them at the same stage as the dried shrimp and sauté until pink.

    How long can leftovers be stored?

    Refrigerate in an airtight container for up to 3 days. Reheat gently on the stovetop with a splash of water to prevent drying out.

    What side dishes pair well with this recipe?

    Steamed white rice is traditional, but you can also serve it with garlic fried rice, quinoa, or a simple cucumber salad dressed with vinegar and pepper.

    Is this dish suitable for vegetarians?

    Replace dried shrimp with mushroom flakes or soy‑based seafood alternatives to keep the umami flavor while staying plant‑based.

    Conclusion

    With just a few pantry staples—mung beans, dried shrimp, and aromatic vegetables—you can create a comforting, protein‑rich Filipino classic. Follow the steps, add your favorite garnishes, and enjoy a dish that’s both nutritious and full of flavor.

  • Homemade Ice Cream in 7 Easy Steps – Simple Recipe for Fresh, Creamy Dessert

    Homemade Ice Cream in 7 Easy Steps – Simple Recipe for Fresh, Creamy Dessert

    Making ice cream at home doesn’t require a culinary degree—just seven straightforward steps and a few quality ingredients. Follow this guide to create a smooth, flavorful dessert that you can personalize with your favorite mix‑ins.

    Key Takeaways

    • Use high‑quality dairy (heavy cream, whole milk) for a rich texture.
    • Measure ingredients precisely for consistent results.
    • Control temperature while cooking the custard to avoid graininess.
    • Experiment with mix‑ins and sauces to make each batch unique.

    Getting Started

    Before you begin, gather the essential tools: a medium saucepan, a whisk, a kitchen scale, a thermometer, and an ice‑cream maker (or a deep freezer for the no‑churn method). Having everything ready will keep the process smooth and enjoyable.

    Prep Your Ingredients

    Organize all components in one place. This reduces mistakes and helps you track each step.

    Gather Fresh Ingredients

    1. Heavy cream (2 cups) – provides the buttery richness.
    2. Whole milk (1 cup) – balances the cream’s thickness.
    3. Granulated sugar (¾ cup) – sweetens without overpowering.
    4. Pure vanilla extract (2 tsp) or a vanilla bean – adds classic flavor.
    5. Optional mix‑ins – fresh fruit, toasted nuts, chocolate chips, or caramel sauce.

    Chop Ingredients Evenly

    If you’re using fruit or chocolate chunks, cut them into uniform pieces (about ½ inch). Even pieces melt and blend evenly, preventing pockets of cold or overly soft spots in the final ice cream.

    Mixing the Batter

    Combine the dry and wet ingredients before heating. Whisk the sugar into the milk and cream until fully dissolved. Add the vanilla extract (or scraped vanilla bean seeds) and whisk again.

    Cooking Your Dish

    Heat the mixture over medium heat, stirring constantly with a silicone spatula. Use a thermometer to reach 170 °F (77 °C); this cooks the egg‑free custard enough to thicken without curdling. Once the mixture coats the back of the spoon, remove it from the heat and chill in an ice bath for 10 minutes.

    Adding Flavor

    After the base is cold (about 40 °F/4 °C), stir in your chosen mix‑ins. For fruit purées, fold them in gently to keep the texture smooth. For crunchy items like nuts or cookie pieces, add them just before churning to preserve crunch.

    Final Touches

    Transfer the chilled mixture to your ice‑cream maker and churn according to the manufacturer’s instructions (usually 20‑30 minutes). If you don’t have a machine, pour the mixture into a shallow pan, freeze, and stir vigorously every 30 minutes for 3‑4 cycles.

    Garnish Ideas

    • Fresh berries or sliced mango for a burst of color.
    • Toasted almond slivers or pistachios for crunch.
    • Drizzle of chocolate, caramel, or fruit coulis.
    • Whipped cream topped with sprinkles for a classic sundae.

    Presentation Tips

    Serve ice cream in chilled bowls, waffle cones, or mason jars. A quick splash of sauce around the plate adds visual flair. For a festive touch, garnish with a mint leaf or edible flower.

    Is the Ensaladang Recipe Similar to the 7 Easy Steps to Make at Home?

    Yes, the Filipino ensaladang recipe follows a comparable “gather, prep, mix, and serve” structure. Both rely on fresh ingredients, even preparation, and a final garnish to deliver a satisfying dish.

    Ready to Serve

    Enjoy your ice cream immediately for a soft‑serve texture, or store it in an airtight container in the freezer for up to two weeks. Let it sit at room temperature for 5 minutes before scooping for the smoothest results.

    Frequently Asked Questions

    Can I make ice cream without an ice‑cream maker?

    Yes. Use the “no‑churn” method: blend heavy cream, sweetened condensed milk, and vanilla, then fold in mix‑ins and freeze, stirring every 30 minutes.

    What’s the best way to prevent ice crystals?

    Chill the custard completely before freezing and stir the mixture regularly during the first hour of freezing. Adding a pinch of corn syrup or a small amount of alcohol can also reduce crystallization.

    How long can homemade ice cream be stored?

    For optimal flavor and texture, consume within 14 days. Keep the container tightly sealed to avoid freezer burn.

    Can I substitute dairy‑free milk?

    Yes. Use coconut milk, almond milk, or oat milk, but add a tablespoon of glycerin or a splash of vodka to improve texture.

    Conclusion

    With these seven easy steps, you can craft creamy, restaurant‑quality ice cream at home. Adjust flavors, add mix‑ins, and experiment with presentation to make each batch uniquely yours. Grab your ingredients, follow the process, and enjoy a fresh, indulgent dessert any time you crave.

  • Sigarilyas Gising‑Gising Recipe: Step‑by‑Step Guide, Health Benefits & Creative Variations

    Sigarilyas Gising‑Gising Recipe: Step‑by‑Step Guide, Health Benefits & Creative Variations

    Key Takeaways

    • Rich in fiber, protein, and vitamins from winged beans.
    • Coconut milk adds creamy texture and healthy fats.
    • Adjust the heat with green chilies or extra pepper.
    • Simple stir‑fry technique works for busy weeknights.

    Benefits of Sigarilyas‑Gising‑Gising Recipe

    Sigarilyas‑Gising‑Gising is more than a tasty comfort food. The winged beans (sigarilyas) provide antioxidants, iron, and plant‑based protein. Coconut milk contributes medium‑chain triglycerides that support heart health, while the chilies boost metabolism and add a dose of vitamin C. Together, these ingredients create a balanced meal that fuels the body and satisfies the palate.

    Step‑by‑Step Guide to Cooking Sigarilyas‑Gising‑Gising

    Follow these steps for a perfectly cooked dish.

    Ingredients Needed

    • 1 lb winged beans (sigarilyas), trimmed and cut into 2‑inch pieces
    • ½ lb ground pork (or ground chicken for a lighter option)
    • 1 cup coconut milk (fresh or canned)
    • 2 tablespoons shrimp paste (bagoong alamang)
    • 4‑5 green chilies, sliced lengthwise
    • 2 cloves garlic, minced
    • 1 small onion, diced
    • 1 tablespoon vegetable oil
    • Salt and pepper to taste

    Cooking Instructions

    1. Prep the beans: Blanch winged beans in boiling water for 2 minutes, then drain and set aside.
    2. Sauté aromatics: Heat oil in a skillet over medium heat. Add garlic and onion; cook until fragrant, about 1 minute.
    3. Brown the pork: Add ground pork, breaking it apart. Cook until no longer pink, about 4‑5 minutes.
    4. Incorporate shrimp paste: Stir in shrimp paste and let it fry for 1 minute to release its umami.
    5. Add coconut milk: Pour in coconut milk, reduce heat, and let it simmer gently for 3‑4 minutes.
    6. Combine beans and chilies: Add the blanched winged beans and sliced green chilies. Cook until beans are tender‑crisp, about 3 minutes.
    7. Season: Taste and adjust with salt and pepper. If you prefer more heat, add a pinch of cayenne.
    8. Serve: Transfer to a serving bowl and enjoy hot over steamed white rice.

    Key Ingredients for Flavorful Sigarilyas‑Gising‑Gising

    Each component plays a specific role in the final taste and texture.

    Essential Ingredients List

    • Winged Beans (Sigarilyas): Provide a crunchy, nutty base.
    • Coconut Milk: Gives a silky, slightly sweet richness.
    • Ground Pork: Adds depth and savory fat.
    • Shrimp Paste: Boosts umami without overpowering.
    • Green Chilies: Deliver the signature “gising” (spicy) kick.

    Preparation Techniques Explained

    Key Ingredient Flavor Profile Prep Method
    Coconut Milk Creamy, slightly sweet Simmer gently with aromatics
    Winged Beans Nutty, crisp Blanch then stir‑fry
    Ground Pork Savory, rich Brown before adding liquids
    Shrimp Paste Umami, salty Sauté with garlic and onion

    Tips for Perfecting Sigarilyas‑Gising‑Gising Dish

    • Control spiciness: Remove seeds from chilies for milder heat.
    • Prevent curdling: Keep the coconut milk on low heat and stir frequently.
    • Maintain crunch: Do not overcook the winged beans; they should stay slightly firm.
    • Season gradually: Add salt after the shrimp paste, then adjust at the end.
    • Serve immediately: The dish tastes best when hot and fresh.

    Creative Variations of Sigarilyas‑Gising‑Gising

    • Swap winged beans for green beans or string beans for a different texture.
    • Use ground turkey or tofu for a lower‑fat version.
    • Add a splash of fish sauce (patis) for extra depth.
    • Incorporate diced carrots or bell peppers for color and sweetness.
    • Try coconut cream instead of milk for an ultra‑rich sauce.

    Serving Suggestions for Sigarilyas‑Gising‑Gising

    • Steamed white rice – the classic pairing.
    • Grilled pork belly or chicken for a hearty combo.
    • A drizzle of patis (fish sauce) or soy sauce on the side.
    • Sliced siling labuyo (bird’s eye chili) for extra heat.
    • Sautéed shrimp or mussels for a seafood twist.

    Are the Cooking Techniques for Sigarilyas‑Gising‑Gising Similar to Making Burong Mustasa?

    The techniques differ. Sigarilyas‑Gising‑Gising is a quick stir‑fry, while Burong Mustasa involves fermenting mustard greens in vinegar. Both may share some ingredients, but the cooking methods are distinct.

    Storing and Reheating Sigarilyas‑Gising‑Gising

    Cool the dish to room temperature, then place it in an airtight container. Refrigerate for up to 3 days. Reheat gently on the stovetop over low heat, adding a splash of coconut milk if the sauce thickens. Ensure the internal temperature reaches 165 °F.

    Nutrition Facts (Per Serving)

    • Calories: ~250 kcal
    • Protein: 12 g
    • Carbohydrates: 10 g
    • Fat: 18 g (mostly from coconut milk)
    • Fiber: 4 g
    • Vitamin C: 15 % DV
    • Iron: 10 % DV

    Frequently Asked Questions

    What Is a Substitute for Winged Bean?

    You can use string beans, green beans, or even water spinach (kangkong). Each will change the texture slightly but still works well.

    What Kind of Vegetable Is Sigarilyas?

    Sigarilyas is the winged bean, a tropical legume with edible pods that have a distinctive “winged” edge. It’s high in protein and fiber.

    How Do You Clean Winged Beans?

    Rinse under cold water, trim the ends, and remove any tough strings with a knife. Pat dry before cooking.

    Can I Make This Dish Vegan?

    Yes. Replace ground pork with crumbled tofu or tempeh and use a vegan shrimp paste or omit it entirely. The coconut milk already provides richness.

    Conclusion

    Sigarilyas‑Gising‑Gising is a vibrant, nutritious Filipino classic that’s easy to prepare and adaptable to many tastes. With the right ingredients, a few simple techniques, and a willingness to experiment, you can bring this flavorful dish to your table any day of the week.

  • Ginisang Okra with Fish – Quick 10‑Minute Filipino Recipe

    Ginisang Okra with Fish – Quick 10‑Minute Filipino Recipe

    Ginisang Okra with Fish is a quick, flavorful Filipino dish ready in just 10 minutes—perfect for busy weeknights.

    Key Takeaways

    • Ready in 10 minutes with minimal cleanup.
    • Uses simple, pantry‑friendly ingredients.
    • High in protein, fiber, and omega‑3 fatty acids.
    • Versatile: swap fish, add veggies, or adjust seasonings.

    Ingredients for Ginisang Okra with Fish

    • 200 g fresh fish fillets (tilapia, mackerel, or any white fish)
    • 150 g fresh okra, sliced into 1‑cm pieces
    • 2 cloves garlic, minced
    • ½ small onion, diced
    • 1 tbsp brown sugar
    • 1 tbsp fish sauce (patis)
    • 1 tsp soy sauce (optional)
    • 1 tsp lemon or vinegar (acidic balance)
    • 2 tbsp cooking oil
    • Salt and pepper to taste
    • Fresh cilantro or parsley for garnish

    Preparation Steps for Ginisang Okra with Fish

    1. Prep the fish: Pat fillets dry, season with a pinch of salt and pepper, then cut into bite‑size pieces.
    2. Dry the okra: Wash, trim stems, slice, and pat dry with a kitchen towel to reduce slime.
    3. Sauté aromatics: Heat oil over medium‑high heat. Add garlic and onion; stir until fragrant (≈30 seconds).
    4. Add fish: Toss the fish pieces into the pan. Cook 2‑3 minutes, stirring gently.
    5. Season: Stir in brown sugar, fish sauce, soy sauce (if using), and lemon/vinegar.
    6. Cook okra: Add sliced okra. Stir‑fry on high heat for 3‑4 minutes until crisp‑tender. Sprinkle pepper.
    7. Finish: Remove from heat, garnish with cilantro, and serve immediately with steamed rice.

    Quick Tips for Cooking Okra Perfectly

    • Pat okra dry before slicing to limit mucilage.
    • Cook over high heat; a quick stir‑fry keeps the pods crunchy.
    • Acidic ingredients (lemon, vinegar, tomatoes) balance slime and brighten flavor.

    Okra Cooking Techniques

    • High‑heat stir‑fry: Keeps okra bright green and crisp.
    • Acid boost: Add a splash of lemon juice at the end.
    • Small pods: Choose tender, thin‑skinned okra for faster cooking.

    Okra Flavor Pairings

    Garlic, onions, tomatoes, and fish create a balanced, savory profile. For extra heat, sprinkle chili flakes or sliced green chilies.

    Choosing Fresh Fish for the Dish

    Fresh fish makes the biggest difference in taste and texture. Look for these indicators:

    Fish Selection Tips

    • Clear, bright eyes.
    • Shiny, metallic skin that springs back when pressed.
    • Mild, briny sea scent—no strong “fishy” odor.
    • Firm flesh that bounces back to the touch.

    Freshness Indicator Check

    Indicator What to Look For What to Avoid
    Eyes Clear and bright Cloudy or sunken
    Skin Shiny, metallic Dull or discolored
    Smell Mild, briny aroma Strong “fishy” odor

    Time‑Saving Cooking Techniques

    • Use pre‑sliced okra from the produce aisle (dry it before cooking).
    • Prep garlic and onion in a food processor for seconds.
    • Cook fish and okra in the same pan to reduce dishes.
    • Batch‑cook the base (garlic, onion, fish sauce) and store for up to 3 days.

    Serving Suggestions for the Dish

    Serve hot over steamed jasmine rice. Garnish with fresh cilantro, a drizzle of lemon juice, and optional sliced red chilies for heat.

    Health Benefits of Okra and Fish

    • Okra: low‑calorie, high in fiber, vitamins C & K, and antioxidants that support heart health and digestion.
    • Fish: lean protein plus omega‑3 fatty acids that aid brain function, reduce inflammation, and lower heart disease risk.
    • Together they provide a balanced, nutrient‑dense meal that supports weight management and overall wellness.

    Possible Variations and Substitutions

    • Swap fish flakes for canned tuna or leftover grilled fish.
    • Use tofu or tempeh for a vegetarian version.
    • Add bell peppers, eggplant, or green beans for extra color and nutrients.
    • Try soy sauce, oyster sauce, or a dash of fish sauce for deeper umami.
    • For a thicker sauce, stir in a 1‑tsp cornstarch slurry (cornstarch + water) at the end.

    Frequently Asked Questions

    What is the best cooking technique for okra?

    Quick stir‑fry over high heat keeps okra crisp and reduces slime.

    How can I prevent okra from getting slimy?

    Dry the pods thoroughly, slice them thinly, and cook fast. Adding acid (lemon, vinegar, or tomatoes) also helps.

    Can I use other types of fish?

    Yes. White fish like tilapia, cod, or even canned salmon work well. Adjust cooking time if the fish is already cooked.

    How do I store leftovers?

    Cool the dish to room temperature, then refrigerate in an airtight container for up to 2 days. Reheat quickly in a skillet to retain texture.

    What side dishes pair well with Ginisang Okra with Fish?

    Steamed jasmine rice is classic, but you can also serve with quinoa, cauliflower rice, or a simple cucumber salad dressed with vinegar.

    Is it okay to freeze this dish?

    Yes. Freeze in a freezer‑safe bag for up to 1 month. Thaw overnight in the fridge and reheat in a pan; add a splash of water if it looks dry.

    Conclusion

    Ginisang Okra with Fish delivers a tasty, nutritious Filipino meal in just 10 minutes. With fresh fish, crisp okra, and a balance of sweet, salty, and acidic flavors, it fits perfectly into a busy lifestyle while supporting health goals. Try the recipe tonight and enjoy a quick taste of the Philippines.

  • Ginisang Gulay Tips & Tricks: Perfect Your Filipino Veggie Stir‑Fry

    Ginisang Gulay Tips & Tricks: Perfect Your Filipino Veggie Stir‑Fry

    Ginisang Gulay is a classic Filipino sautéed vegetable dish that shines when you balance color, texture, and umami. Follow these expert tips to elevate every bite, whether you’re cooking for family or impressing guests.

    Key Takeaways

    • Choose a rainbow of vegetables for visual appeal and varied texture.
    • Use high‑smoke‑point oils to prevent burnt flavors.
    • Season with umami‑rich ingredients like fish sauce or shrimp paste.
    • Finish with fresh garnishes for brightness and crunch.

    Vegetable Selection

    Pick vegetables that offer contrast in bite and taste. Popular choices include:

    • Eggplant – soft, absorbs sauces.
    • Squash (kalabasa) – sweet, adds body.
    • String beans – crisp, bright green.
    • Okra – mucilaginous, boosts nutrition.
    • Bitter melon – bitter notes that balance sweetness.

    Mixing a sweet vegetable (squash) with a bitter one (bitter melon) creates depth, while crunchy beans keep the dish lively.

    Proper Cutting Techniques

    Uniform pieces cook evenly and look professional.

    • Slicing – thin rounds for eggplant and squash.
    • Dicing – ½‑inch cubes for quick‑cooking veggies.
    • Julienning – match‑stick strips for okra or beans.

    Use a sharp chef’s knife, keep the tip on the board, and cut against the grain to avoid bruising.

    Flavorful Seasoning Tips

    Season in layers. Start with aromatics, add umami, then balance salt and sweet.

    Herb and Spice Blends

    Combine the following for a versatile base:

    Herb/Spice Purpose
    Garlic Depth & aroma
    Onion Sweetness
    Ginger Warmth
    Black pepper Gentle heat
    Bay leaf Subtle fragrance

    Umami‑Rich Ingredients

    • Fish sauce – salty, savory boost.
    • Shrimp paste (bagoong) – pungent depth.
    • Mushroom powder – vegetarian alternative.

    Add 1–2 teaspoons early in the sauté to let the flavors meld.

    Balancing Saltiness and Sweetness

    Combine 1 tablespoon soy sauce with ½ teaspoon brown sugar or a drizzle of honey. Taste after each addition and finish with a splash of calamansi juice or white vinegar for bright acidity.

    Cooking Oil Choices

    High smoke‑point oils keep the vegetables crisp without bitter notes.

    Oil Types for Sautéing

    • Canola oil – neutral flavor, 400°F smoke point.
    • Peanut oil – subtle nutty taste, 450°F.
    • Avocado oil – buttery, 520°F – excellent for high heat.
    • Coconut oil – tropical hint, 350°F (use for medium heat).

    Smoke Point Importance

    When oil reaches its smoke point it breaks down, creating off‑flavors and harmful compounds. Keep the pan at medium‑high heat (around 350‑375°F) and add oil just before the aromatics.

    Flavor Considerations

    For a nutty finish, drizzle ½ teaspoon toasted sesame oil at the end of cooking. For a richer mouthfeel, stir in a splash of infused garlic‑olive oil just before serving.

    Sauteing Temperature Control

    Start with medium‑high heat to sear the aromatics, then reduce to medium once the vegetables hit the pan. This prevents burning while allowing a light caramelization that deepens flavor.

    • Stir constantly for the first 2 minutes.
    • Add quicker‑cooking veggies (string beans, okra) last.
    • Finish with a quick 30‑second toss on high heat for a glossy finish.

    Common Mistakes to Avoid

    • Overcrowding the pan – steam instead of sauté.
    • Using low‑smoke‑point oil – leads to bitter taste.
    • Adding all vegetables at once – uneven texture.
    • Skipping the taste test – unbalanced seasoning.

    Ingredient Substitutions

    Original Substitute Notes
    Fish sauce Soy sauce + a dash of mushroom powder Vegetarian-friendly
    Shrimp paste Fermented bean paste Similar umami
    Bitter melon Zucchini Milder flavor, same texture

    Garnishing Ideas

    • Chopped cilantro or parsley for freshness.
    • Toasted sesame seeds for crunch.
    • Thinly sliced scallions added at the end.
    • A squeeze of fresh calamansi or lemon juice.
    • A dollop of plain Greek yogurt for creaminess.

    Texture Tips for Perfecting

    1. Cut vegetables uniformly for even cooking.
    2. Blanch hard veggies (carrots, squash) for 1 minute before sautéing.
    3. Cook on high heat for 2–3 minutes, then lower to medium to finish.
    4. Remove from heat when vegetables are tender‑crisp and still bright.

    Serving Suggestions and Pairings

    Serve Ginisang Gulay over steaming white rice, or pair with:

    • Grilled tilapia or fried fish for protein.
    • Adobo‑marinated chicken for a hearty combo.
    • Cold cucumber salad with vinegar for contrast.
    • Plain quinoa for a gluten‑free twist.

    Storing Leftover Ginisang Gulay

    1. Cool to room temperature, then transfer to an airtight container.
    2. Refrigerate for up to 3 days.
    3. Reheat in a skillet with a splash of vegetable broth to restore moisture.
    4. Discard if you notice off smells or mold.

    Frequently Asked Questions

    What nutrients does Ginisang Gulay provide?

    The dish offers vitamins A, C, K, folate, potassium, and dietary fiber from the mix of vegetables, supporting eye health, immunity, and digestion.

    Can I make Ginisang Gulay vegan?

    Yes. Replace fish sauce with soy sauce or mushroom soy, and use fermented bean paste instead of shrimp paste.

    How do I adjust the spiciness?

    Add sliced bird’s eye chilies with the aromatics, or stir in a pinch of crushed red pepper flakes at the end.

    What’s the difference between Ginisang Gulay and Dinengdeng?

    Both are vegetable‑based, but Ginisang Gulay is a dry sauté, while Dinengdeng is a broth‑heavy soup that often includes fermented fish (bagoong) and shrimp. Read more about Dinengdeng here.

    Conclusion

    Perfecting Ginisang Gulay boils down to four simple steps: choose colorful vegetables, cut them uniformly, season with umami‑rich ingredients, and sauté in a high‑smoke‑point oil at the right temperature. Add fresh garnishes, serve with rice or protein, and store leftovers properly for a quick, nutritious meal.

  • Step-by-Step Guide to Making Delicious Chopped Tomato Onion Bagoong Isda

    Step-by-Step Guide to Making Delicious Chopped Tomato Onion Bagoong Isda

    Creating a delicious Chopped Tomato Onion Bagoong Isda salad starts with finely chopping fresh tomatoes and dicing onions, then mixing them with bagoong isda to achieve a rich, savory umami taste.

    Introduction to Chopped Tomato Onion Bagoong Isda

    Chopped Tomato Onion Bagoong Isda is a beloved Filipino side dish known for its bold and refreshing flavor profile. This condiment combines fresh tomatoes, crisp onions, and bagoong isda, a traditional fermented fish sauce. When you mix these ingredients, you create a savory and tangy salad that enhances any meal. It is a staple in many Filipino households and is perfect for adding depth to grilled or fried dishes.

    Key Takeaways

    • Use fresh, ripe tomatoes and crisp onions for the best texture.
    • Adjust the amount of bagoong isda based on your salt tolerance.
    • Serve this dish alongside grilled fish, chicken, or pork for a complete meal.
    • Store leftovers in a cool place to keep the flavors strong.

    Preparing the Ingredients

    To make the best Chopped Tomato Onion Bagoong Isda, you must select high-quality fresh produce. Start by washing your tomatoes and onions thoroughly under cool running water. Ensure your tomatoes are ripe and firm to the touch. For the onions, red onions offer a slight sweetness, while white onions provide a sharper bite. Choose the variety that suits your taste preference. You will also need a clean bowl and a sharp knife for precise chopping.

    Bagoong isda is a fermented fish sauce that adds a unique umami depth to the dish. You can purchase it from local Asian markets or online grocery stores. Check the label to ensure it is fresh and has not been exposed to high temperatures before buying.

    Chopping the Tomatoes and Onions

    Proper knife skills are essential for creating a balanced texture in your salad. Begin by cutting the tomatoes in half lengthwise. Remove the seeds and excess juice to prevent the salad from becoming too watery. Next, slice the tomatoes into small, even cubes. This ensures every bite has a consistent crunch.

    For the onions, remove the outer dry skin and trim the root ends. Cut the onion in half from root to tip. Then, make horizontal cuts across the onion followed by vertical cuts. This technique creates uniform pieces that mix well with the tomatoes. Refer to the table below for a quick reference guide:

    Tomatoes Onions
    Halve and remove seeds Peel and trim ends
    Cube into small pieces Slice in half
    Dice evenly Make cross cuts

    Once chopped, place the vegetables in a large mixing bowl. Ensure the pieces are roughly the same size for an even distribution of flavors.

    Mixing in the Bagoong Isda

    Adding the bagoong isda is the most critical step in this recipe. It provides the signature salty and fishy flavor that defines Filipino cuisine. Pour the bagoong isda over the chopped vegetables. Start with a small amount, about two tablespoons per cup of vegetables.

    Stir the mixture gently to combine the ingredients without crushing the tomatoes. Taste the salad to check the saltiness. If it is too salty, add a squeeze of fresh lemon juice or a pinch of sugar to balance the flavors. The goal is a harmonious blend where the fishiness complements the freshness of the vegetables.

    Serving and Presentation Tips

    Presentation matters when serving your Chopped Tomato Onion Bagoong Isda. Transfer the salad to a serving bowl or plate. Garnish the top with freshly chopped cilantro or spring onions for a pop of green color. This adds visual appeal and a fresh herbaceous note.

    For a more sophisticated look, drizzle a little extra virgin olive oil over the top. This enhances the natural oils in the tomatoes and adds a glossy finish. Serve the salad immediately after mixing to enjoy the crisp texture. You can also add a squeeze of calamansi or lime juice for extra acidity.

    Garnish Ideas Flavor Boosters
    Chopped Cilantro Lemon Juice
    Sliced Spring Onions Black Pepper
    Red Chili Flakes Fresh Garlic

    Using Chopped Tomato Onion Bagoong Isda in Other Recipes

    This versatile salad works well as a condiment for various Filipino dishes. It adds a zesty kick to grilled meats, fried rice, and noodle soups. You can use it as a topping for Tortang Talong to elevate the flavor of the fried eggplant.

    Another great option is to mix it into your Sinigang or Adobo. The fermented fish sauce deepens the savory notes of these classic dishes. You can also use it as a sandwich spread on toasted bread with a fried egg. The Chopped Tomato Onion Bagoong Isda brings a unique taste that pairs well with almost any protein.

    Storage and Leftover Suggestions

    If you have leftover salad, store it in an airtight container. Place the container in the refrigerator for up to three days. The flavors often improve after sitting overnight as the ingredients meld together. Stir the mixture well before serving to redistribute the liquid and bagoong isda.

    Do not freeze this salad. Freezing will break down the tomato cell walls, making the texture mushy upon thawing. Instead, use leftovers as a topping for hot rice or noodles to warm them up slightly. This prevents the salad from spoiling while keeping it fresh.

    Pro Tips for Perfect Flavor

    To get the most out of your Chopped Tomato Onion Bagoong Isda, consider these additional tips. Always use room temperature ingredients for better mixing. If the tomatoes are too watery, pat them dry with a paper towel before chopping. This prevents the salad from becoming soggy.

    For a spicier version, add finely minced fresh chili peppers. This adds heat without changing the texture. You can also add a clove of minced garlic for extra aroma. These small adjustments can make the dish your own.

    Frequently Asked Questions

    What Are the Ingredients in Bagoong Isda?

    Bagoong Isda is primarily made from fermented fish and salt. Some versions include garlic, chili, or other spices depending on the region. It is a key ingredient in many Filipino dishes because of its strong umami flavor.

    What Goes Well With Bagoong Isda?

    This condiment pairs best with grilled or fried proteins like fish, pork, and chicken. It also complements rice dishes, noodles, and even some vegetable stir-fries. The combination with tomatoes and onions creates a vibrant side dish that enhances the overall meal experience.

    Can I Make Bagoong Isda at Home?

    Making bagoong isda at home is possible but requires patience. The process involves fermenting fish for several months in a salt solution. It is often easier and safer to buy pre-made bagoong isda from a trusted source. This ensures the product is safe to eat and has a consistent flavor.

    How Do I Balance the Saltiness?

    If the bagoong isda is too salty, add more tomatoes or onions to dilute the flavor. You can also add a splash of vinegar or lemon juice to cut through the salt. Adjusting the ratio of vegetables to sauce is key to finding the perfect taste.

    Can I Use Bagoong Alamang Instead?

    Bagoong Alamang is made from shrimp paste and has a different flavor profile. While you can use it as a substitute, the taste will be sweeter and less fishy. For a traditional Chopped Tomato Onion Bagoong Isda, stick with the fish sauce for the authentic taste.

    Conclusion

    Creating a delicious Chopped Tomato Onion Bagoong Isda is simple and rewarding. By following these steps, you can enjoy a flavorful side dish that fits any occasion. The combination of fresh ingredients and bold flavors makes this dish a standout addition to your table.

    With the right presentation and storage tips, you can enjoy this flavorful salad anytime. Try it out today and elevate your meal with this easy and tasty recipe. Whether you are a fan of Filipino cuisine or just looking to try something new, the Chopped Tomato Onion Bagoong Isda salad is a must-try dish that will delight your taste buds.

  • The Ultimate Guide to Mastering Filipino Ginisang Repolyo at Home

    The Ultimate Guide to Mastering Filipino Ginisang Repolyo at Home

    Mastering the art of Ginisang Repolyo brings you closer to the heart of Filipino home cooking. This simple yet flavorful dish features sautéed cabbage, carrots, and savory seasonings that create a perfect balance of taste and nutrition. Whether you are a beginner or a seasoned cook, this guide will help you create an authentic meal that delights your family.

    From selecting the right ingredients to perfecting the sauté technique, every step matters. By following these proven methods, you can transform a humble vegetable dish into a restaurant-quality experience right in your kitchen.

    Key Takeaways

    • Enjoy a nutritious Filipino meal packed with vitamins, fiber, and antioxidants.
    • Learn traditional cooking methods to achieve the perfect tender-crisp texture.
    • Discover creative ways to customize your Ginisang Repolyo with different proteins and spices.
    • Understand how to serve this dish as a versatile side or main course.

    Health Benefits of Ginisang Repolyo

    Cabbage, the primary ingredient in this dish, is a nutritional powerhouse. It is low in calories but exceptionally high in vitamin C and vitamin K, making it ideal for heart health and bone strength.

    The high fiber content supports healthy digestion and helps maintain a feeling of fullness, which is beneficial for weight management. Additionally, the antioxidants present in the cabbage protect your cells from damage caused by free radicals.

    Regularly including Ginisang Repolyo in your diet boosts your immune system and promotes overall well-being. This makes it a smart choice for those looking to eat healthier without sacrificing flavor.

    Traditional Ingredients for Ginisang Repolyo

    To make authentic Ginisang Repolyo, you need fresh cabbage, carrots, and specific seasonings that define Filipino cuisine. Shrimp, pork, or chicken are common additions that add protein and depth to the dish.

    Essential seasonings include oyster sauce, fish sauce, and black pepper. These ingredients work together to create the savory umami flavor profile that Pinoy households love. Aromatics like garlic and onions are also crucial for building a flavorful base.

    Essential Repolyo Ingredients

    For a delicious and traditional result, gather your core ingredients. Cabbage provides the crunchy texture, while carrots add sweetness and color. Garlic and onions serve as the aromatic foundation.

    Ingredient Role Benefits
    Cabbage Main vegetable base Adds crunch and fiber
    Carrots Sweetener and color Balances savory notes
    Garlic Flavor foundation Adds pungency and aroma
    Oyster Sauce Seasoning agent Provides salty-sweet depth

    Cooking Repolyo Perfectly

    Success in cooking Ginisang Repolyo depends on managing heat and timing. You want the cabbage to remain tender-crisp rather than becoming mushy. Sautéing the garlic and onions first releases their essential oils, enhancing the overall aroma.

    Seasoning is key. Adding oyster sauce and fish sauce late in the cooking process preserves their distinct flavors. Finish with a sprinkle of black pepper or a dash of vinegar for brightness. Garnishing with fresh herbs or sliced chili adds a final touch of color and zest.

    Step-by-Step Guide to Cooking Ginisang Repolyo

    Follow this detailed guide to ensure your dish turns out perfectly every time.

    1. Preparation Phase:
      • Wash and chop the cabbage into bite-sized wedges or strips.
      • Peel and slice the carrots into thin rounds or julienne strips.
      • Mince garlic and onions finely to ensure even cooking.
      • Prepare your protein (shrimp, pork, or chicken) by cutting it into small pieces.
    1. Sautéing the Aromatics:
      • Heat oil in a wok or large skillet over medium-high heat.
      • Add garlic and onions, cooking until they turn fragrant and golden.
      • Stir in the protein and cook until it is browned and cooked through.
    1. Adding Vegetables:
      • Toss in the cabbage and carrots.
      • Stir-fry for 3-5 minutes until the vegetables are tender but still crisp.
      • Do not overcrowd the pan to ensure proper searing.
    1. Seasoning and Serving:
      • Stir in oyster sauce, fish sauce, and a pinch of black pepper.
      • Simmer for one minute to let the flavors meld.
      • Serve immediately with hot steamed rice.

    Variations of Ginisang Repolyo Recipe

    While the classic recipe is delicious, you can easily adapt it to suit your taste preferences. Adding different proteins changes the texture and richness of the dish. You can also adjust the spice level to match your family’s preference.

    For a heartier meal, add ground pork or diced chicken breast. Vegetarian versions can include tofu or mushrooms for extra protein. Experimenting with these ingredients keeps the dish exciting and nutritious.

    Flavor Enhancements

    Elevate your dish with these specific enhancements:

    1. Adjust the Spice Levels: Use bird’s eye chili or red pepper flakes for heat, or keep it mild for a gentle flavor.
    2. Incorporate Additional Vegetables: Add bell peppers, snow peas, or green beans for extra crunch and nutrients.
    3. Explore Different Seasonings: A splash of calamansi juice or vinegar can brighten the rich sauce.
    4. Get Creative with Garnishes: Top with fried garlic, chopped cilantro, or green onions for visual appeal.

    Cooking Techniques

    The method you use to cook the vegetables impacts the final result. Stir-frying over high heat is traditional, but you can also steam the cabbage first to ensure it is fully cooked before sautéing.

    Braising the vegetables with a bit of broth infuses them with more flavor. Alternatively, grilling the cabbage beforehand adds a smoky char that complements the savory sauces. These techniques allow you to customize the texture and taste profile.

    Tips for Perfecting Ginisang Repolyo

    To ensure your dish is perfect, pay close attention to the cooking process. Here are expert tips to help you master this Filipino staple:

    1. Control the Heat: High heat cooks the vegetables quickly, preserving the crunch. Low heat can make them soggy.
    2. Don’t Overcook: Remove the pan from heat before the cabbage is fully soft. It will continue to cook from residual heat.
    3. Season Gradually: Add sauces slowly and taste as you go to avoid making the dish too salty.
    4. Use Fresh Ingredients: Fresh cabbage and carrots make a noticeable difference in texture and flavor compared to old produce.

    Serving Suggestions for Ginisang Repolyo

    This dish is incredibly versatile and pairs well with many Filipino staples. The classic pairing is with a bowl of hot, steamed white rice, which absorbs the savory flavors of the sauce.

    It also serves as an excellent accompaniment to fried fish, grilled pork, or chicken adobo. For a complete meal, serve it alongside Pancit Bihon Guisado for a mixed vegetable and noodle feast.

    You can even use the cooked cabbage mixture as a filling for lumpiang prito or spring rolls, adding a nutritious twist to traditional appetizers. These options show how adaptable this recipe is for various meal types.

    Storage and Reheating Instructions for Ginisang Repolyo

    Leftovers are common, but proper storage ensures they remain safe and tasty. Let the dish cool completely before placing it in an airtight container to prevent condensation buildup.

    1. Store in the refrigerator for up to 3 days for short-term freshness.
    2. Freeze the dish for up to 2 months for long-term preservation.
    3. Reheat in a skillet over medium heat to restore the texture of the cabbage.
    4. Ensure the internal temperature reaches 165°F (74°C) for food safety before eating.

    Popular Pairings With Ginisang Repolyo

    Enhance your meal by pairing it with steamed white rice for a balanced dining experience. This classic combination is the backbone of many Filipino lunches and dinners.

    It also complements fried fish or grilled meat beautifully, providing a fresh contrast to the richness of the protein. Whether served as a side dish or a main course, the flavors of Ginisang Repolyo adapt well to different meal compositions.

    For a more substantial feast, consider pairing it with stir-fried noodle dishes like Pancit Bihon Guisado, where the textures and flavors complement each other perfectly.

    How Does Ginisang Repolyo Compare to Dinengdeng Na Saluyot in Filipino Cuisine?

    Both dishes are staples in Filipino cooking, yet they differ in preparation and regional roots. While Ginisang Repolyo is a simple sautéed cabbage dish, Dinengdeng na Saluyot is a vegetable stew often associated with Northern Luzon.

    Dinengdeng holds a special cultural significance of dinengdeng in that region, representing traditional cooking methods and local heritage. Understanding these differences helps you appreciate the variety within Filipino cuisine.

    Frequently Asked Questions About Ginisang Repolyo

    Here are answers to common questions to help you cook this dish with confidence.

    1. What is Ginisang Repolyo?
      It is a Filipino vegetable dish made by sautéing cabbage with carrots and seasonings like oyster sauce and fish sauce.
    2. How is it typically served?
      It is commonly served as a side dish with rice or as a main course with grilled meats.
    3. Are there variations?
      Yes, you can add shrimp, pork, chicken, or tofu, and adjust the spice level to your liking.
    4. Why is it popular?
      It is budget-friendly, quick to prepare, and packed with essential nutrients for a healthy diet.

    Is Repolyo a Cabbage?

    Yes, repolyo is simply the Tagalog word for cabbage. It is a versatile vegetable high in fiber, vitamins C and K, and antioxidants. Cooking it properly retains its crunch and nutritional value, making it a great addition to any meal.

    How Many Calories Are There in Ginisang Repolyo?

    The calorie count typically ranges from 120 to 150 calories per serving. This varies based on the amount of oil and meat used. Cabbage and carrots are low-cal, but adding shrimp or pork can increase the count slightly. Using less oil and lean meats keeps the dish lighter.

    Conclusion

    Mastering the art of cooking Ginisang Repolyo at home is a rewarding experience. With simple ingredients and a few key techniques, you can create a flavorful meal that your whole family will love.

    Experiment with different variations and serving suggestions to make this dish your own. Whether you stick to the traditional recipe or try new twists, the result is always delicious.

    Start cooking today and savor the delightful taste of this Filipino classic. Enjoy your healthy and tasty dinner!

  • Mastering the Art of Pickling Daikon and Atcharang Labanos

    Mastering the Art of Pickling Daikon and Atcharang Labanos

    Mastering the art of pickling daikon and atcharang labanos involves balancing flavors and proper preparation to create a tangy condiment. Achieve the perfect crunch and flavor infusion by selecting fresh ingredients and creatively presenting these pickled delights.

    Key Takeaways

    • Choose fresh, organic Daikon and Labanos for optimal pickling results.
    • Balance vinegar, sugar, salt, and water for flavorful pickling solutions.
    • Properly jar and seal pickled radishes for extended freshness and taste.
    • Present pickled Daikon and Labanos creatively to enhance culinary experiences.

    Daikon and Labanos: The Basics

    When pickling Daikon and Labanos, understanding the basics of these radishes is essential.

    Daikon, a large, white radish, offers a mild flavor perfect for absorbing pickling brines.

    On the other hand, Labanos, a smaller radish in red or pink hues, brings a slightly peppery taste to your pickling creations.

    Both radishes pack a nutritional punch, boasting vitamins, minerals, and antioxidants that make them excellent choices for pickling.

    By preserving Daikon and Labanos in a brine or vinegar solution, you not only enhance their flavors but also prolong their shelf life.

    Once pickled, these radishes transform into a tangy and crunchy delight that can elevate your dishes as a side, condiment, or flavorful ingredient.

    Selecting Fresh Ingredients

    To ensure optimal pickling results, start by carefully selecting fresh daikon radish and carrots with firm textures and vibrant colors. Here are some tips to help you choose the best ingredients:

    1. Look for fresh ingredients without blemishes or soft spots to ensure a crisp and flavorful final product.
    2. Select daikon radish and carrots that are free from mold or signs of spoilage to prevent contamination in the pickling process.
    3. Opt for organic or locally sourced daikon radish and carrots to support sustainable farming practices and enhance the overall taste of the pickled dish.

    Washing and Prepping Vegetables

    For optimal pickling results, start by thoroughly washing and peeling the daikon and carrots under running water to remove any dirt or impurities.

    Once cleaned, peel the outer skin of the daikon and carrots before slicing or shredding them. It’s essential to cut them into uniform sizes to ensure even pickling and a consistent texture.

    After slicing, soak the daikon and carrots in a brine solution to enhance their flavor and prolong their preservation. Remember to drain them properly after soaking to avoid excessive moisture during the pickling process.

    Making the Pickling Solution

    Consider the blend of vinegar, sugar, salt, and water for your pickling solution to achieve the ideal balance of flavors and preservation for your daikon and carrots.

    Here are essential tips for making the perfect pickling solution:

    1. Adjust the ratio of vinegar to water based on your preference for acidity.
    2. Add sugar to balance the sourness of the vinegar and enhance the overall flavor.
    3. Salt is crucial for preservation and adds a savory element to your pickled daikon and carrots.

    Jarring and Sealing Techniques

    After preparing your pickling solution, the next step is mastering the jarring and sealing techniques for your pickled daikon and atcharang labanos. Properly sterilize jars before filling them to ensure food safety. Use a hot water bath canning method to seal the jars and create a vacuum for preservation.

    Leave appropriate headspace to prevent breakage during canning. Ensure lids are tightly secured for freshness. Store sealed jars in a cool, dark place for flavors to meld.

    Jarring and Sealing Techniques
    1. Sterilize jars before filling
    2. Use hot water bath canning method
    3. Leave appropriate headspace
    4. Secure lids tightly
    5. Store in a cool, dark place

    Fermentation Process Explained

    To understand the fermentation process, focus on the natural transformation of sugars in daikon and labanos by beneficial bacteria into tangy lactic acid. Here are three key points to grasp the essence of fermentation:

    1. Beneficial Bacteria: Lactic acid bacteria play a crucial role in converting sugars into lactic acid, providing the distinctive tangy flavor of pickled daikon and labanos.
    2. Preservation and Flavor: Fermentation not only extends the shelf life of the vegetables but also enhances their flavors and textures, creating a unique culinary experience.
    3. Probiotic Benefits: The fermentation process generates probiotics that promote gut health, making pickled daikon and labanos not only delicious but also beneficial for digestion.

    Flavoring Your Pickled Vegetables

    To add depth to your pickled vegetables, infuse them with a medley of vinegar, sugar, salt, and spices for a delectable and well-balanced flavor profile. Experiment with herbs like garlic, peppercorns, and bay leaves to enhance the taste.

    Adjust the sugar and vinegar amounts to achieve your preferred level of sweetness and acidity in your atchara. Let the pickled vegetables sit for at least 24 hours to allow the flavors to develop.

    The pickling process not only preserves the vegetables but also imparts a unique and delicious taste that complements a variety of dishes. Enjoy the tangy, sweet, and flavorful experience of homemade pickled daikon and labanos.

    Storage and Shelf Life Tips

    For enhanced freshness and longevity, seal your pickled daikon and carrots in airtight containers before storing them in the refrigerator.

    Here are some tips for storing your pickled vegetables:

    1. Refrigeration: Store atcharang labanos and carrots in a sealed container in the refrigerator for up to 2 weeks.
    2. Avoid Exposure: Keep the pickled daikon and carrots away from direct sunlight and heat to maintain their quality.
    3. Proper Sealing: Properly sealed jars or containers can help extend the shelf life of the pickled radish and carrots.

    Remember to check for any signs of spoilage, such as off odors or mold, before consuming the atcharang labanos and carrots. Pickled daikon and carrots can develop stronger flavors over time, so consider your preference when storing them.

    Can I Use Pickled Daikon and Atcharang Labanos in My Homemade Vegetarian Pancit Sotanghon Recipe?

    Yes, you can use pickled daikon and atcharang labanos in your homemade vegetarian pancit sotanghon recipe. These flavorful and crunchy pickled vegetables will add a delicious tangy kick to your dish, making it even more satisfying for vegetarians.

    Serving Suggestions and Pairings

    When it comes to serving pickled daikon, think about the flavor combinations and presentation ideas that will enhance your meal.

    Try pairing the tangy and sweet pickled radish and carrots with savory dishes like adobo or grilled meats for a delicious contrast.

    You can also get creative by using these pickled veggies as toppings for sandwiches, tacos, or salads to add an extra burst of flavor.

    Flavor Combinations

    Enhance your culinary experience by exploring the versatile flavor pairings of pickled daikon with other dishes. Here are three delightful combinations to consider:

    1. Grilled Meats and Fish: The zesty notes of pickled daikon complement the savory flavors of grilled meats and fish, adding a tangy twist to your meal.
    2. Steamed Rice and Filipino Cuisine: Pairing pickled daikon with steamed rice and traditional Filipino dishes creates a harmonious blend of sweet, tangy, and savory flavors on your plate.
    3. Sandwiches and Wraps: Elevate your sandwiches and wraps by adding pickled daikon as a flavorful topping. The crunchiness and tanginess of the daikon will bring a new dimension to your handheld meals.

    Presentation Ideas

    Explore creative ways to present and pair Atsarang Labanos and Carrots to elevate your dining experience effortlessly. Serve this tangy and sweet side dish alongside savory or grilled dishes for a burst of flavor.

    For a balanced meal, pair Atsarang Labanos and Carrots with steamed rice and grilled fish. The vibrant colors of radish and carrots will add an appealing touch to any plate. Enhance the presentation by garnishing with fresh herbs like cilantro or parsley.

    Consider serving Atsarang Labanos and Carrots in small ramekins or traditional Filipino dining plates for an authentic dining experience. These simple yet elegant presentation ideas will surely impress your guests and elevate the overall dining experience.

    Frequently Asked Questions

    How Long Does Pickled Daikon Last?

    Pickled daikon lasts 1-2 months in the fridge when stored airtight. Ensure it’s submerged in pickling liquid, check for mold or off smells. Sealed jars and refrigeration are crucial for freshness.

    Do Daikon Radishes Need to Be Peeled?

    You don’t need to peel daikon radishes. The skin is thin, edible, and full of nutrients. Keeping it on helps with crunchiness and texture when pickling. Plus, it adds fiber for digestion and looks great in dishes.

    What Do Koreans Eat With Pickled Radish?

    Koreans often pair pickled radish, known as ‘danmuji,’ with fried chicken or fried foods. It adds a tangy crunch to dishes like kimbap and tteokbokki. The bright yellow color enhances the visual appeal and cleanses the palate.

    What Do You Do With Daikon Radishes?

    When you have daikon radishes, you can pickle them for a tangy side, slice for salads, substitute in dishes, or garnish foods. Packed with vitamin C and fiber, they add a nutritious crunch and mild, peppery flavor.

    Conclusion

    Now that you’ve mastered the art of pickling daikon and atcharang labanos, enjoy the crunchy, tangy, and sweet flavors of this Filipino dish.

    Remember to store your pickled vegetables properly to extend their shelf life and savor them with your favorite meals.

    Experiment with different flavor combinations to create a unique and delicious side dish that will impress your family and friends.

    Happy pickling!

  • Easy Filipino Ensaladang Talong Recipe in 5 Steps

    Easy Filipino Ensaladang Talong Recipe in 5 Steps

    To create a delicious Ensaladang Talong, choose ripe eggplants, roast them until charred, prepare a tangy dressing, and add tomatoes, onions, and chili peppers for personalization. Enhance your dish by incorporating tasty toppings like apple mangoes or grilled pork belly for a delightful Filipino eggplant salad experience.

    Key Takeaways

    • Pick firm, fresh eggplants to get the best texture and taste.
    • Roast eggplants until the skin is blackened and the inside is soft.
    • Mix vinegar, sugar, and olive oil for a balanced dressing.
    • Add tomatoes, onions, chilies, or other toppings to customize your ensaladang talong.

    Selecting Fresh Eggplants

    When choosing eggplants for your Ensaladang Talong, look for ones that feel heavy and firm. They should have shiny skin without any soft spots or dark blemishes. A fresh green stem cap is a good sign of quality. Heavy eggplants indicate they are ripe and full of moisture.

    Avoid any eggplants that look wrinkled or dull. The shiny skin shows the vegetable is fresh. Picking the right eggplants is the first step to a great Filipino Ensaladang dish.

    Roasting the Eggplants Perfectly

    For the best Ensaladang Talong, roast your eggplants over an open flame for about 10 to 15 minutes. You want the skin to be charred and blistered, which gives a smoky flavor. Let the eggplants rest for 5 to 10 minutes after roasting. This resting time helps them soften inside.

    Brushing the skin with oil before roasting helps them cook evenly. The charred exterior and soft interior mean the eggplants are ready. These steps make your Filipino Ensaladang dish taste better.

    Preparing the Flavorful Dressing

    A good dressing is essential for Ensaladang Talong. Mix vinegar, sugar, and olive oil to get a tangy and sweet taste. The vinegar gives a sharp kick, while the sugar balances the sourness. Olive oil adds richness and helps blend the flavors together.

    You can also add diced tomatoes, onions, and chili peppers to the dressing mix. Here is a table summarizing the main ingredients for the sauce:

    Ingredient Purpose
    Vinegar Adds tanginess
    Sugar Balances flavors
    Olive Oil Emulsifies and enriches

    Mixing in Tasty Toppings

    To make your Ensaladang Talong better, mix in toppings like diced tomatoes, onions, and chilies. Try adding apple mangoes or a classic Filipino vinaigrette for extra flavor. Adjust the dressing to your liking for a personal touch.

    The fresh mix of toppings gives a nice contrast in the Filipino eggplant salad. You can add grilled pork belly or shrimp paste for a savory twist. Roasted eggplant or Chinese eggplant works well too. Bagoong alamang brings a unique umami flavor, and cucumber salad adds crunch.

    These toppings also give your dish a boost of Vitamin C.

    Can I Use Ensaladang Recipe Ingredients in Sinabawang Isda at Gulay Recipe?

    Yes, you can use the ingredients from the ensaladang recipe in the sinabawang isda at gulay recipe. The fresh vegetables and tangy flavors will add a delicious twist to the traditional sinabawang isda at gulay recipe, creating a refreshing and flavorful dish.

    Serving and Enjoying the Ensaladang Talong

    When serving Ensaladang Talong, pair it with grilled or fried dishes for a great meal. This Filipino side dish goes well with Inihaw na Liempo or Fried Fish. It adds a fresh and tangy element to the meal.

    You can serve the salad fresh or chilled. It is a versatile addition to any Filipino cuisine spread. To keep the flavors strong, refrigerate the Ensaladang Talong for 3-5 days with the dressing. This allows the ingredients to mix well. Just note that tomatoes may release some liquid during storage.

    Enjoy this grilled eggplant salad with your favorite mains for a satisfying meal with classic Filipino recipes.

    Frequently Asked Questions

    How to Prepare Ensaladang Talong Step by Step?

    To prepare Ensaladang Talong step by step, start by gathering fresh eggplants and vegetables. Chop the tomatoes and onions, mix with vinegar, and roast the eggplants. Combine everything and enjoy your colorful and delicious creation.

    What Type of a Mixture Is the Ensaladang Talong?

    Ensaladang Talong is a savory mixture of mashed eggplant, tomatoes, onions, vinegar, and sometimes shrimp paste. It is known for its tangy and slightly smoky taste. This makes it a versatile dish that works with many Filipino main dishes.

    Conclusion

    In just 5 simple steps, you can enjoy a delicious and refreshing Filipino Ensaladang dish.

    By grilling the eggplants, mixing them with tomatoes, onions, vinegar, and shrimp paste, you create a flavorful and satisfying salad.

    This recipe offers a perfect balance of textures and flavors, making it a great side dish for any meal.

    Try it today and treat your taste buds to a burst of Filipino flavors!

  • Authentic Filipino Shrimp Laing Recipe: Follow These Steps

    Authentic Filipino Shrimp Laing Recipe: Follow These Steps

    To make an authentic Filipino Shrimp Laing, gather taro leaves, coconut milk, shrimp, pork belly, and spices. Clean the shrimp thoroughly, then cook them with coconut milk, chili peppers, and spices. Simmer for an hour to soften the taro leaves and infuse the flavors. Garnish with green onions, coconut cream, and calamansi for a vibrant dish. Store leftovers properly for up to 3 days in the fridge or freeze for longer storage.

    Key Takeaways

    • Experience the burst of flavors from chili peppers and coconut milk in this authentic Filipino Shrimp Laing recipe.
    • Enjoy the sweet complement of coconut milk with savory shrimp, offering a nutritious and protein-rich meal option.
    • Enhance your meal with customizable spice levels and delicious garnishes like green onions, coconut cream, and calamansi.
    • Store leftovers properly for up to 3 days in the fridge or freeze for longer storage, reheat gently with coconut milk if needed.

    Ingredients for Shrimp Laing

    To make authentic Shrimp Laing, gather taro leaves, coconut milk, shrimp, pork belly, and spices as the essential ingredients.

    The creamy coconut milk, when combined with the succulent shrimp, creates a delightful base for this Filipino dish. The pork belly adds a rich and fatty dimension, enhancing the overall taste and texture.

    Taro leaves play a vital role, infusing the dish with a unique flavor that pairs perfectly with the shrimp. When these fresh ingredients come together, the dish achieves an authentic and flavorful profile that’s sure to tantalize your taste buds.

    Ensure you have these key components ready before embarking on the journey to create a delicious Shrimp Laing dish.

    Preparing the Shrimp

    When preparing the shrimp for your Authentic Filipino Shrimp Laing, start by cleaning them thoroughly, ensuring to cut the antenna and devein to remove any unwanted parts.

    Here are some essential steps to follow:

    1. Cleanliness is Key: Properly cleaning the shrimp ensures a fresh and delicious taste in your dish.
    2. Protein Powerhouse: Shrimp is packed with protein, making it a nutritious addition to your meal.
    3. Fresh is Best: Opt for fresh shrimp to enhance the overall taste and texture of your Shrimp Laing.
    4. Seafood Sensation: The shrimp’s seafood flavor blends perfectly with the creamy coconut milk base, creating a rich and satisfying dish.

    Make sure to handle the shrimp with care to fully enjoy the delightful flavors it brings to your Shrimp Laing.

    Cooking the Shrimp Laing

    For optimal flavor and texture, start by heating a pan and extracting oil from pork fat to saute aromatics when cooking the Shrimp Laing. Add shrimp paste for a savory depth of flavor. Incorporate fresh coconut milk to create a creamy base for the dish. The chili peppers will provide a spicy kick to the Shrimp Laing recipe.

    Cooking the Shrimp Laing for an hour ensures that the taro leaves are soft and fully infused with flavors. Remember to clean the shrimp properly by cutting the antenna and deveining them before adding them to the dish. Below is a table to visualize the key ingredients used in cooking the Shrimp Laing:

    Ingredients
    Coconut milk
    Chili peppers
    Shrimp paste
    Taro leaves

    Adding Coconut Milk

    Consider incorporating the fresh coconut milk into the simmering pot to enrich the flavors of your Shrimp Laing recipe. Here’s why using coconut milk is essential for an authentic Filipino Shrimp Laing:

    1. Creaminess: The coconut milk adds a rich and creamy texture that complements the dried Taro leaves perfectly.
    2. Traditional Flavor: Mixing coconut milk with dried Taro leaves is a classic combination that defines the taste of this Filipino dish.
    3. Homemade Superiority: Homemade coconut milk offers a superior taste and consistency compared to canned options.
    4. Delicious Results: Putting effort into preparing coconut milk from scratch rewards you with a more flavorful and authentic Shrimp Laing dish.

    Spicing It up

    When spicing up your Shrimp Laing, consider experimenting with different flavorful spice combinations to elevate the taste.

    Balancing the heat levels by adjusting the amount of chili peppers used can help you achieve the perfect level of spiciness.

    Enhancing the taste profile of your dish through the careful selection and combination of spices will make your Shrimp Laing truly unforgettable.

    Flavorful Spice Combinations

    Enhance the flavor profile of your shrimp laing by combining green and red chili peppers for a balanced heat. To create a truly flavorful experience, consider the following spice combinations:

    1. Green and red chili peppers – Infuse your dish with a harmonious blend of spiciness that tantalizes your taste buds.
    2. Ginger, garlic, and onion – Elevate the aroma and taste of the coconut milk-based sauce, adding layers of complexity.
    3. Shrimp paste – Introduce a savory umami richness that deepens the overall flavor profile of the laing.
    4. Ground black pepper – Fine-tune the spiciness level to achieve a well-balanced and satisfying dish.

    Experiment with these spice combinations to craft a shrimp laing that suits your palate perfectly.

    Balancing Heat Levels

    To achieve the perfect balance of heat in your Shrimp Laing, adjusting the quantity of chili peppers is key. Chili peppers play a crucial role in spicing up the dish, adding that signature kick. By controlling the amount of chili peppers used, you can tailor the spiciness to your liking.

    Whether you prefer a milder heat or a fiery kick, the level of spiciness in your Shrimp Laing can be customized by increasing or decreasing the number of chili peppers. Tasting and adjusting the spice level gradually while cooking is essential to ensure you reach the desired heat intensity.

    Balancing the heat levels ensures that everyone can enjoy this flavorful dish made with coconut, Taro leaves, and, of course, chili peppers.

    Enhancing Taste Profile

    For an added burst of flavor, consider incorporating a mix of aromatic spices into your Shrimp Laing recipe. Here’s how you can enhance the taste profile of your dish:

    1. Spiciness Boost: Adding green and red chili peppers can elevate the spiciness level of your Shrimp Laing.
    2. Customization Control: Balancing the amount of chili peppers allows you to customize the spice level according to your taste preferences.
    3. Flavor Infusion: Chili peppers not only bring heat but also contribute significantly to the overall flavor profile of the dish.
    4. Variety Experimentation: Try using different types of chili peppers to explore unique and varied levels of spiciness in your Shrimp Laing creation.

    Let It Simmer

    Allow the flavors to meld by letting your shrimp laing simmer gently on the stove.

    This low and slow cooking method enhances the richness of the dish. Remember, the longer you let it simmer, the more intense and flavorful it will become.

    Flavorful Simmering Process

    Enhance the flavors of your Authentic Filipino Shrimp Laing by gently simmering the ingredients together until they meld perfectly.

    Here are some key points to keep in mind during the simmering process:

    1. Allow the flavors of shrimp, coconut milk, and taro leaves to blend harmoniously.
    2. Ensure that the shrimp and taro leaves are cooked just right.
    3. Let the gentle simmering thicken the coconut milk into a rich, creamy sauce.
    4. Simmer for an hour to let the spices and aromatics infuse fully.

    Perfecting Cooking Time

    To perfect the cooking time for your Authentic Filipino Shrimp Laing, focus on achieving a soft texture for the taro leaves while allowing the flavors to fully infuse. Simmering the dish for around 1 hour helps in developing the rich taste and creamy texture of the coconut milk. The slow cooking process melds the flavors of the shrimp, coconut milk, and spices perfectly.

    Simmering also tenderizes the shrimp and blends all the ingredients harmoniously. Remember, patience is key to achieving a delicious and well-balanced Shrimp Laing dish.

    Coconut Milk Taro Leaves Simmering Flavors
    Creamy texture Soft Develops Infuses
    Rich taste Tender Melds Perfect
    Harmonious Flavors Blends Delicious

    Garnishing the Dish

    For a vibrant and flavorful touch to your Shrimp Laing dish, consider garnishing it with fresh chili slices. To elevate the dish even further, try these garnishing suggestions:

    1. Sprinkle some chopped green onions for a fresh and flavorful contrast.
    2. Drizzle a bit of coconut cream to enhance the richness and creaminess.
    3. Squeeze fresh calamansi or lime juice over the dish for a citrusy kick.
    4. Add a sprinkle of toasted garlic chips for a crunchy texture and nutty flavor.

    These garnishes not only enhance the presentation but also contribute to a more complex and satisfying flavor profile for your Authentic Filipino Shrimp Laing.

    Serving Suggestions

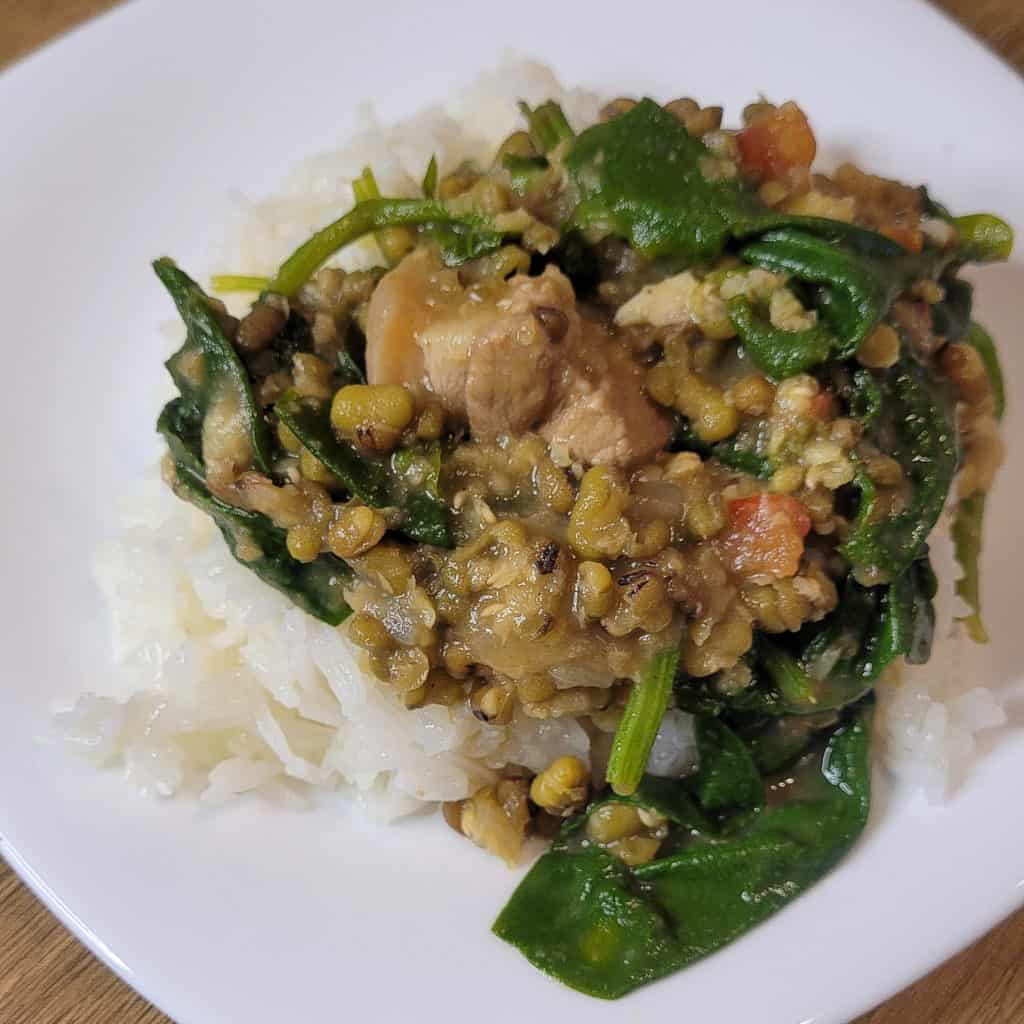
    Consider serving your delicious Shrimp Laing over a bed of steaming rice to fully enjoy its rich coconut milk sauce. This traditional Filipino dish can be elevated with simple yet satisfying pairings. Here are some serving suggestions to enhance your Shrimp Laing experience:

    Serving Suggestion Description Pairing
    Fried Fish Crispy fish complements the creamy shrimp laing Tilapia or Bangus
    Pork Adobo The tangy flavors of adobo balance the richness of the dish Sliced pork adobo
    Grilled Chicken Juicy grilled chicken adds a smoky contrast Chicken inasal

    These pairings create a harmonious meal that highlights the flavors of the coconut milk-based Shrimp Laing.

    Storing Leftovers

    Properly store any leftover Shrimp Laing in airtight containers in the fridge for up to 3 days. When handling leftovers, follow these tips for optimal storage and reheating:

    1. Avoid Spoilage: Coconut milk in the dish can spoil quickly, so refrigerate promptly.
    2. Extend Shelf Life: For longer storage, freeze the Shrimp Laing for up to 2 months.
    3. Reheat Gently: Maintain flavors and texture by reheating on low heat.
    4. Rehydrate if Needed: Add more coconut milk when reheating to prevent dryness.

    Can I Use Dried Shrimp in the Authentic Filipino Shrimp Laing Recipe?

    Yes, you can definitely use dried shrimp in the Authentic Filipino Shrimp Laing recipe. The dried shrimp adds a unique umami flavor that enhances the dish. If you’re looking for a step-by-step tasty mung bean dish tutorial, incorporating dried shrimp into your Shrimp Laing recipe would be a great idea.

    Enjoy Your Shrimp Laing!

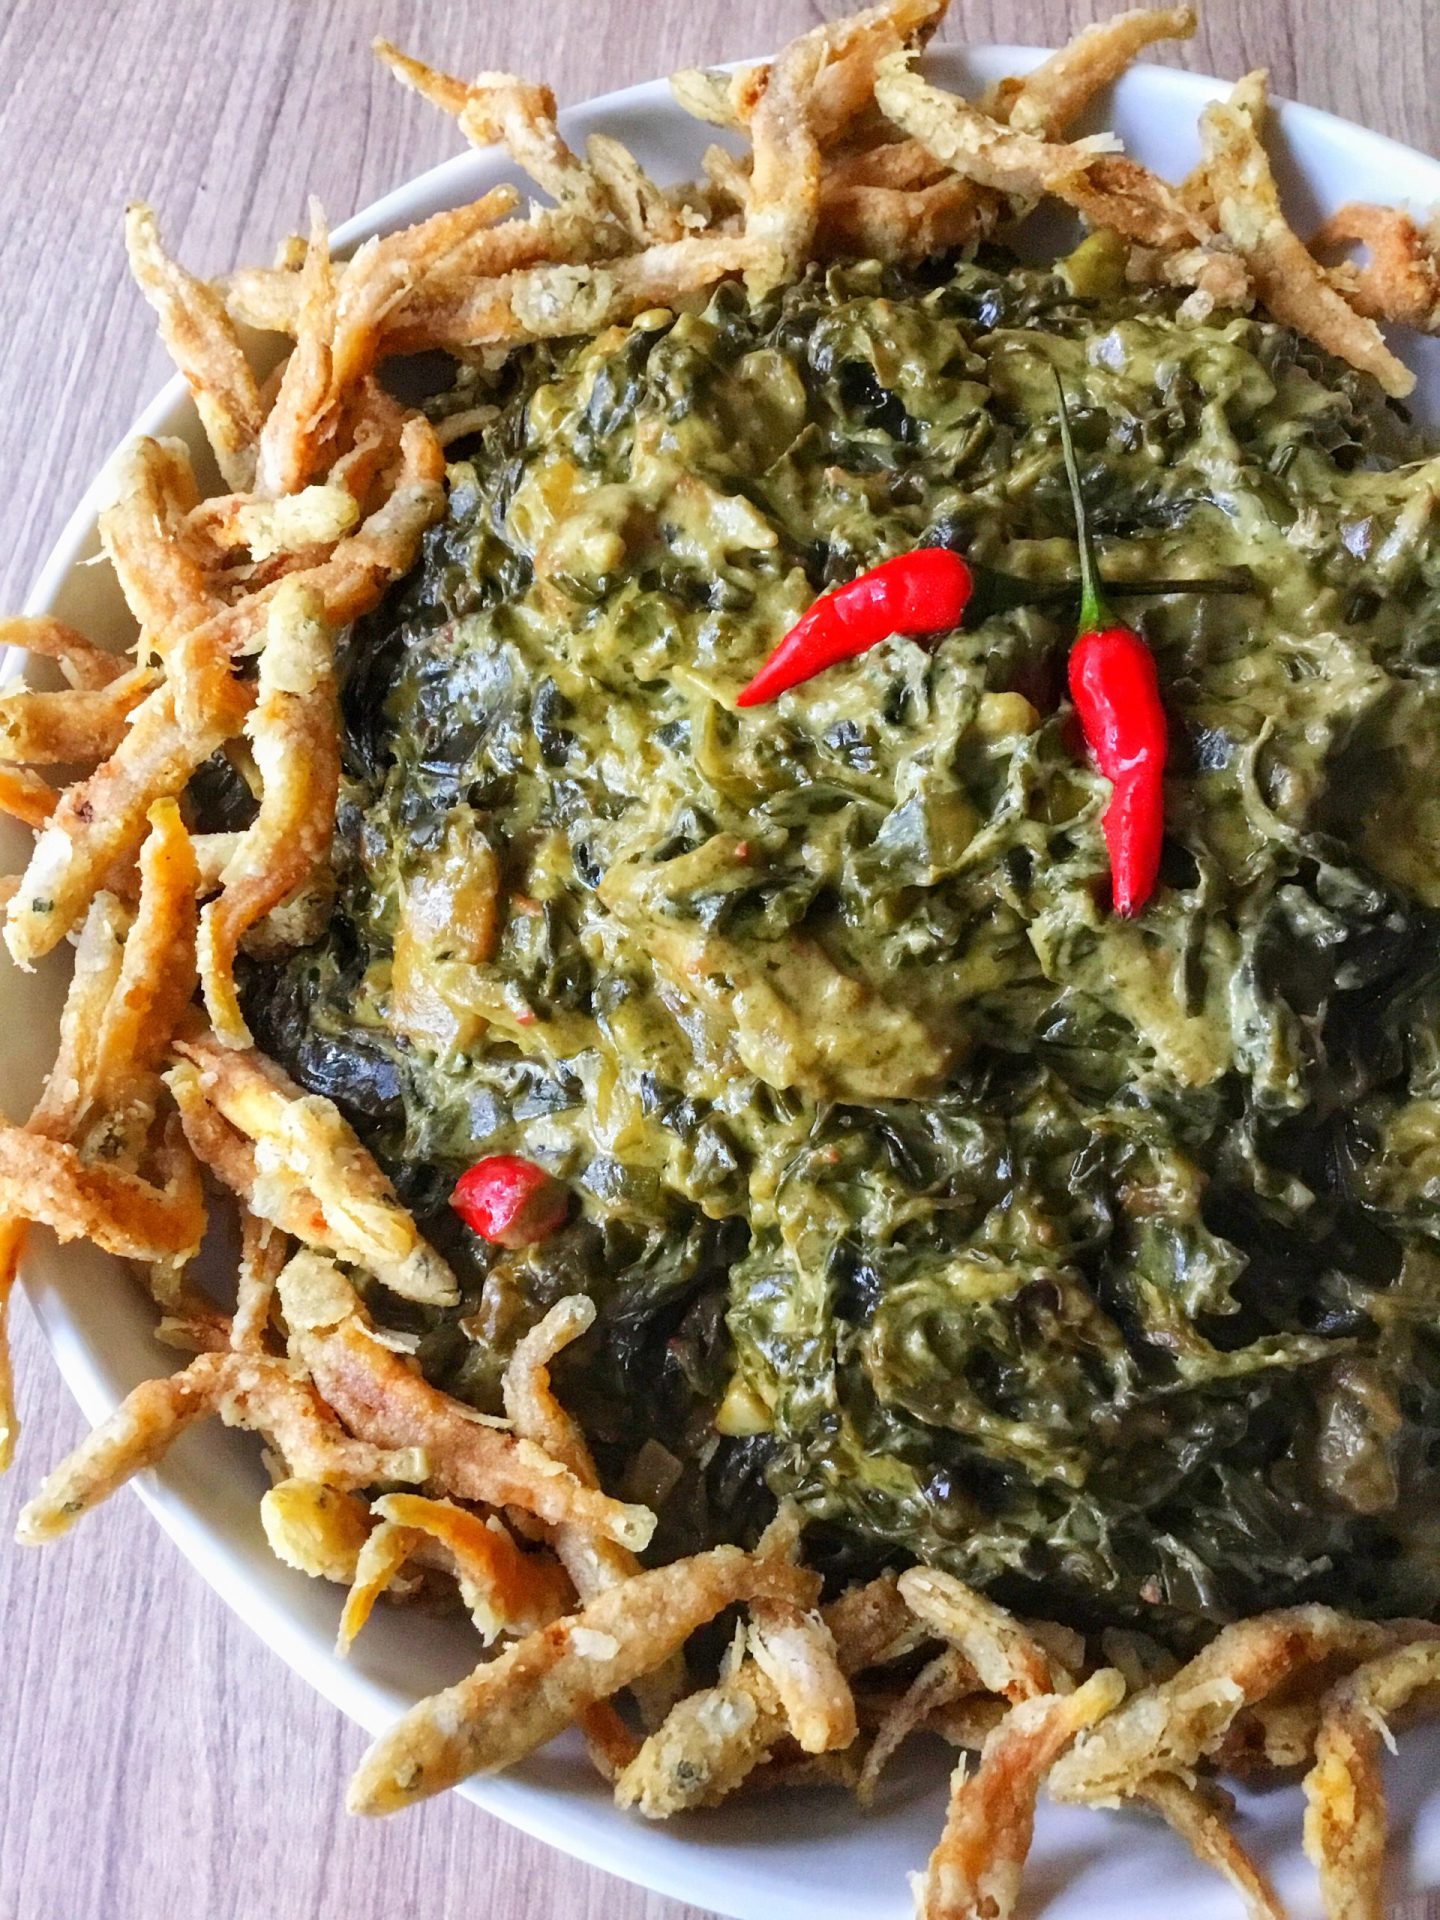
    Indulge in the rich flavors of your Authentic Filipino Shrimp Laing! This creamy and spicy dish hails from the Bicol region, combining the goodness of coconut milk with the succulent taste of shrimp.

    Each bite offers a burst of flavors that showcase the culinary mastery of using chili peppers and coconut milk in Bicolano cuisine. The sweetness of the coconut milk perfectly complements the savory shrimp, creating a harmonious balance that will leave your taste buds craving for more.

    With its high protein content from the shrimp, Shrimp Laing not only satisfies your palate but also provides a nutritious meal option. Experience the unique and delightful taste of Shrimp Laing, a beloved dish among Filipino food enthusiasts.

    Frequently Asked Questions

    What Is Laing Made Of?

    Laing is made of dried taro leaves, coconut milk, pork belly, shrimp paste, garlic, onion, ginger, and chili peppers. It’s a traditional Filipino dish known for its creamy and spicy flavors, often served with rice.

    How Long Should You Cook Taro Leaves?

    Cook taro leaves in coconut milk for 45 minutes to 1 hour. Adjust cooking time for desired tenderness. Ensure leaves are soft and flavorful. Avoid overcooking for a mushy texture. Cook until tender and infused with coconut milk and flavors.

    How Long Does Laing Last in the Fridge?

    Laing can last up to 5 days in the fridge if stored properly. For longer storage, freeze it for up to 1 month. Reheat by microwaving or simmering on low heat. Add more coconut milk to rehydrate if needed.

    Can You Freeze Laing?

    Yes, you can freeze laing. Store it in airtight containers for up to 2 months. Reheat gently on low heat to avoid curdling. Add extra coconut milk if needed. Freezing helps preserve flavors and aids in meal planning.

    Conclusion

    Now that you’ve followed these steps to make authentic Filipino Shrimp Laing, you’re ready to enjoy a delicious and flavorful meal.

    The combination of shrimp, coconut milk, and spices creates a dish that’s sure to satisfy your taste buds.

    Don’t forget to serve it with warm rice for a truly authentic experience.

    Enjoy your Shrimp Laing!