Author: A. Pineda

  • 7 Easy Steps to Make Ginisang Upo With Sardinas

    7 Easy Steps to Make Ginisang Upo With Sardinas

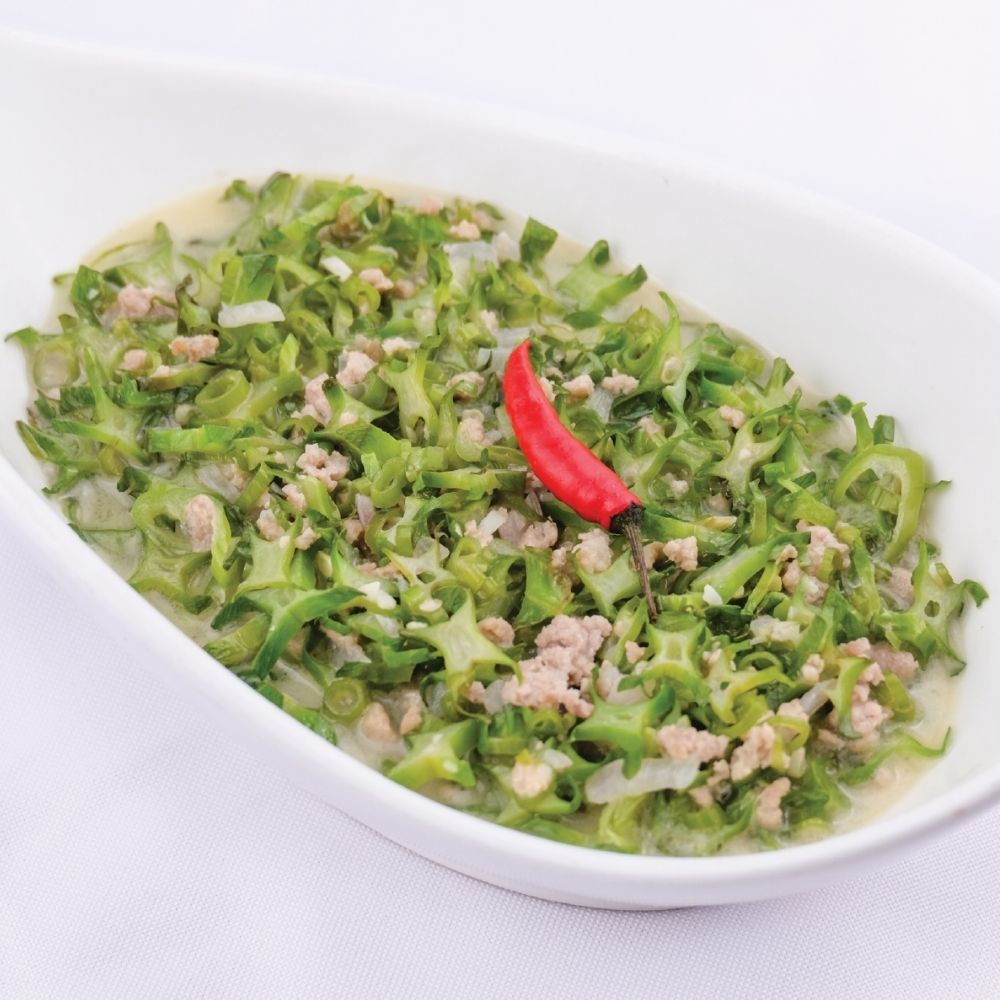
    To make Ginisang Upo with Sardinas, sauté aromatics for flavor, combine sardines and bottle gourd, and season well for a hearty Filipino dish. Enjoy a delicious and budget-friendly meal by following these 7 easy steps to impress your family and friends with your cooking skills.

    Key Takeaways

    • Saute aromatics for flavor foundation.
    • Combine sardines and bottle gourd for a hearty dish.
    • Develop rich taste with proper seasoning.
    • Ensure tender bottle gourd for a balanced texture.

    Prepare the Ingredients

    When preparing Ginisang Upo with Sardines, peel and slice a medium bottle gourd to begin the recipe.

    The addition of 2 cans of spicy sardines in tomato sauce brings a flavorful punch to the dish.

    You should also slice a medium yellow onion to sauté along with the ingredients, enhancing the overall taste.

    Don’t forget to crush 4 cloves of garlic to elevate the aroma of the dish.

    Lastly, cube 2 medium ripe tomatoes to introduce a tangy sweetness that balances the flavors.

    Saute the Aromatics

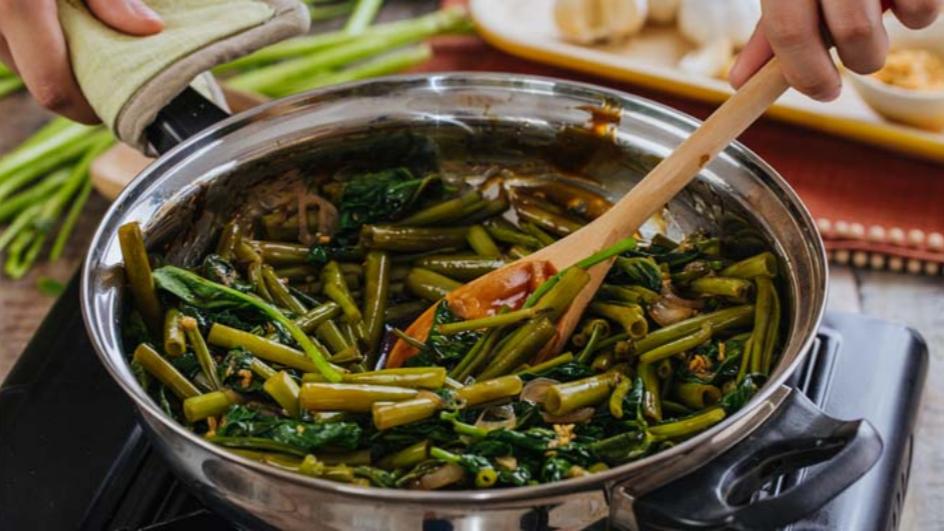
    Saute the garlic and onions together until they release their fragrant aromas and turn translucent for a flavorful base. This process helps to build the foundational flavors of your ginisang upo dish. Make sure to caramelize the onions slightly to enhance their natural sweetness.

    Constantly stir the aromatics to prevent burning and ensure even cooking. The addition of garlic and onions brings depth and complexity to the overall taste of the sauteed bottle gourd. By sauteing these ingredients properly, you set the stage for a delicious and aromatic dish.

    Next, we’ll move on to adding the sardines to complete this flavorful Filipino recipe.

    Add the Sardines

    For an extra burst of flavor and texture, consider incorporating canned spicy sardines into your ginisang upo dish. Here are some reasons why adding sardines can elevate your dish:

    • Canned spicy sardines are recommended for an extra kick of flavor in the dish.
    • The tomato sauce from the sardines adds richness and depth to the overall taste.
    • Sardines provide a good source of protein and omega-3 fatty acids in the dish.

    Adding sardines not only complements the mild flavor of the bottle gourd but also contributes to the heartiness and texture of the ginisang upo dish. It’s a simple way to enhance both the taste and nutritional value of your meal.

    Cook the Bottle Gourd

    To cook the bottle gourd, ensure the skin is peeled lengthwise for easy removal before slicing it uniformly for even cooking. If the bottle gourd is mature, remove the seeds and spongy interior. Cooking until tender yet slightly crisp will help maintain its natural flavors.

    Remember, the bottle gourd will continue to soften in residual heat, so avoid overcooking to preserve its texture. Once the bottle gourd is prepared, it will complement the sardines in tomato perfectly, adding a subtle sweetness to the dish.

    Cooking the bottle gourd correctly is essential to ensure it blends harmoniously with the flavors of the sardines, creating a delicious and well-balanced Ginisang Upo dish.

    Combine the Ingredients

    Now, let’s get ready to combine the ingredients for your Ginisang Upo with Sardines. This step is crucial as it sets the stage for the flavors to meld together beautifully.

    Pay attention to ingredient preparation tips and cooking technique insights to ensure a delicious outcome.

    Ingredient Preparation Tips

    Have you considered how combining the peeled and sliced bottle gourd with drained sardines, crushed garlic, sliced yellow onion, and cubed ripe tomatoes can enhance the flavors of your Ginisang Upo dish? Here are some ingredient preparation tips to get you started:

    • Peel the bottle gourd lengthwise and slice it uniformly for even cooking.
    • Drain the sardines from the cans and set them aside for later use in the recipe.
    • Crush the garlic cloves and slice the yellow onion to add layers of flavor to the dish.

    Preparing these ingredients in advance not only streamlines the cooking process but also ensures a well-balanced and delicious outcome for your Ginisang Upo with Sardinas.

    Cooking Technique Insights

    For optimal flavor infusion, start by sautéing the onions and garlic until fragrant before adding the tomatoes in your Ginisang Upo with Sardines. This initial step helps build a flavorful base for your dish.

    When the onions and garlic have softened, introduce the tomatoes for a tangy sweetness. Sauté the sliced bottle gourd for around 3 minutes to maintain its crisp texture, adding a fresh element to the dish.

    Boil the canned sardines with water to allow the flavors to meld together, creating a delicious broth. Finally, season with fish sauce and pepper at the end to enhance the overall taste of your Ginisang Upo with Sardines.

    Season and Simmer

    Season the Ginisang Upo with Sardines by adding fish sauce and pepper to enhance the flavors before allowing it to simmer for 3-5 minutes. This step is crucial for the dish to develop its rich taste and for the ingredients to blend harmoniously.

    Here are some essential points to keep in mind while simmering:

    • Ensure the bottle gourd is tender but still slightly crisp.
    • Stir occasionally to prevent sticking and ensure even cooking.
    • Taste and adjust the seasoning as needed for a perfectly balanced flavor profile.

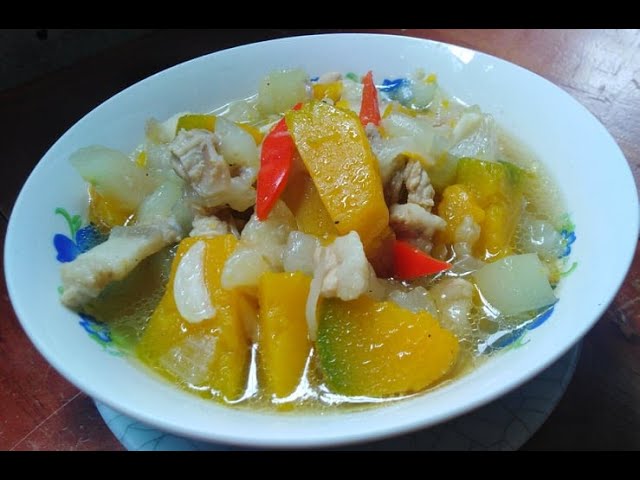
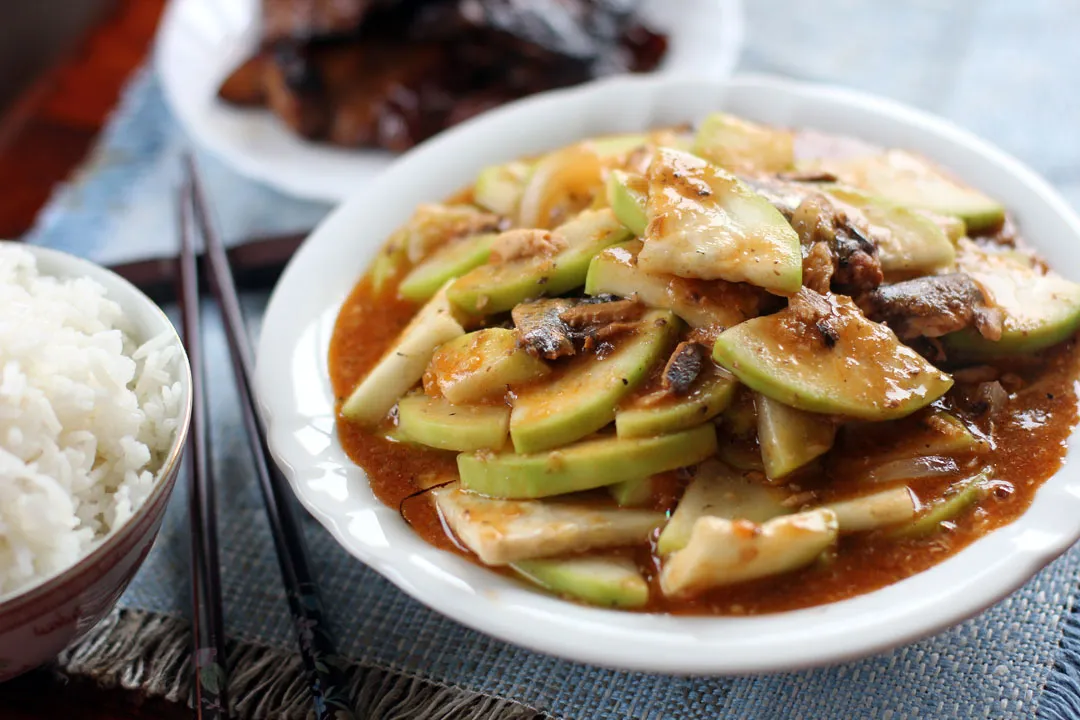
    Can I Substitute Sayote for Upo in the Ginisang Upo With Sardinas Recipe?

    Yes, you can substitute sayote for upo in the ginisang upo with sardinas recipe. Both vegetables have a similar texture and absorb flavors well. For a simple ginisang sayote recipe, just follow the same steps as you would for ginisang upo and enjoy a delicious, healthy dish.

    Serve and Enjoy

    When serving Ginisang Upo with Sardines, consider presentation tips to enhance the visual appeal of the dish.

    Experiment with flavor pairing ideas like adding scrambled eggs or hard-boiled eggs for a delightful combination.

    For storage suggestions, remember that leftovers can be refrigerated for up to 3 days and reheated for future enjoyment.

    Presentation Tips

    Elevate the presentation of your Ginisang Upo with Sardines by garnishing it with chopped green onions or parsley for a vibrant touch. To enhance your dining experience, consider the following tips:

    • Add a squeeze of calamansi or lemon: Enhance the flavors with a citrusy kick.
    • Serve hot over steamed rice: Enjoy the dish with a side of steamed rice for a satisfying meal.
    • Pair with scrambled eggs or a simple salad: Complement the Ginisang Upo with Sardines with a side of scrambled eggs or a light salad.

    These simple presentation tips won’t only make your dish look appetizing but also add layers of flavor to your meal.

    Flavor Pairing Ideas

    To fully enjoy your Ginisang Upo with Sardines, consider these flavorful pairing ideas to elevate your dining experience. Serve it with steamed white rice for a complete meal, or add scrambled eggs or hard-boiled eggs for extra protein.

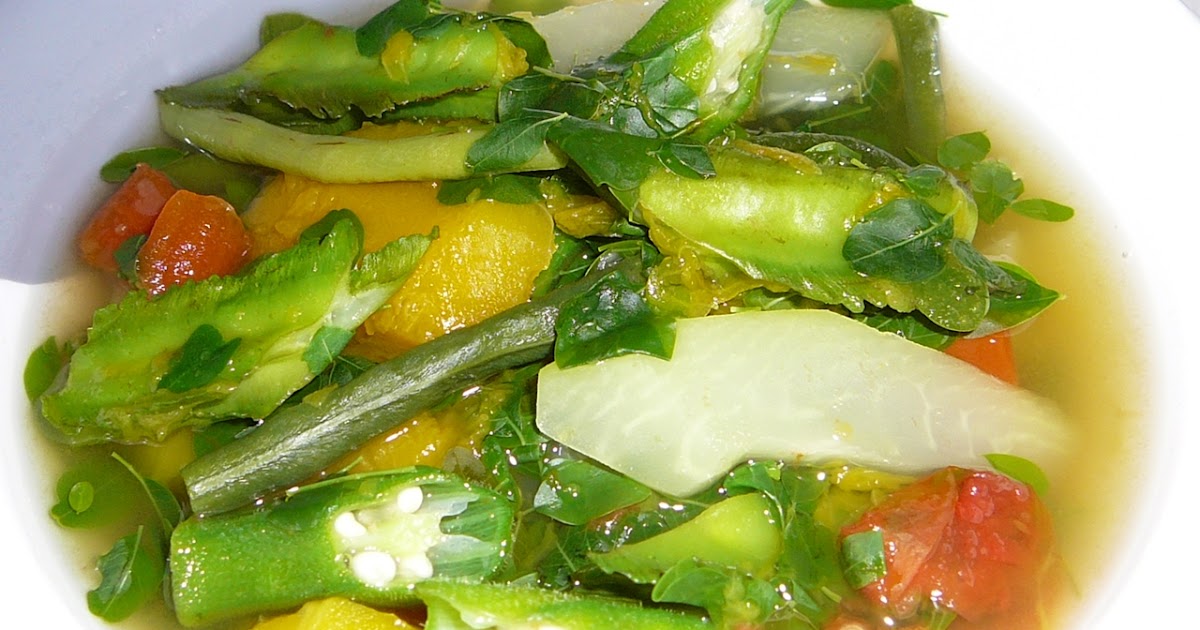
    For a refreshing contrast, pair it with a side of fresh cucumber tomato avocado salad. If you’re looking for a heartier option, try serving it alongside a beef and baby corn stir-fry.

    To explore different flavors, complement this dish with Filipino mango and tomato salad for a burst of sweet and tangy tastes. These pairing ideas will enhance the flavors of the bottle gourd dish and make your meal more enjoyable.

    Storage Suggestions

    For optimal freshness, store any leftover Ginisang Upo with Sardines in the refrigerator for up to 3 days.

    • Keep it in an airtight container to preserve flavors.
    • Reheat thoroughly to 165°F before consuming for safety.
    • Discard any leftovers after 3 days to maintain taste and quality.

    Frequently Asked Questions

    How Do You Prepare Sardines?

    To prepare sardines, open the cans, drain the excess liquid, separate the fish from the sauce, and flake them with a fork. The sardines bring a rich flavor to your dish. Enjoy making tasty meals!

    Do You Remove Seeds of Upo?

    When cooking upo, remove the seeds if mature for a better taste and texture. Tough mature seeds can affect the dish’s quality and cooking evenly. Enjoy a uniform and pleasant dish by taking out the seeds.

    Conclusion

    In just 7 easy steps, you can now enjoy a delicious and budget-friendly meal of Ginisang Upo with Sardinas. This Filipino dish is quick to make and packed with flavor, making it a perfect option for any meal of the day.

    So why wait? Try making this versatile and satisfying dish today and impress your family and friends with your cooking skills!

  • Quick and Tasty Bulanglang Na Gulay From Batangas Tutorial

    Quick and Tasty Bulanglang Na Gulay From Batangas Tutorial

    Bulanglang Na Gulay is a traditional, healthy vegetable soup from Batangas, Philippines, rich in fiber and essential nutrients, perfect with rice and grilled fish. It supports digestive health, boosts immunity, and aids in digestion, making it a versatile and nutritious choice for any meal.

    Key Takeaways

    • Bulanglang Na Gulay is a traditional, healthy vegetable soup from Batangas, Philippines.
    • Simple recipe with essential nutrients like fiber, vitamins, and minerals.
    • Supports digestive health, boosts immunity, and aids in digestion.
    • Versatile dish with variations for different tastes, perfect with rice and grilled fish.

    Ingredients for Bulanglang Na Gulay

    For making Bulanglang Na Gulay, gather the following common ingredients: squash, string beans, eggplant, malunggay leaves, and okra. This vegetable soup dish is a popular and traditional choice in Batangas, Philippines.

    The combination of these vegetables not only creates a flavorful dish but also offers a good mix of essential vitamins, minerals, and fiber. When chopped and boiled together, these ingredients come together to form a nutritious meal that’s often enjoyed with rice.

    Bulanglang Na Gulay is particularly favored by vegetarians seeking a light and healthy option. The simplicity of the ingredients and the ease of preparation make this dish a go-to for those looking for a delicious way to incorporate more vegetables into their diet.

    Step-by-Step Cooking Instructions

    Now, let’s get cooking!

    You’ll need to gather all the ingredients and follow the simple cooking process explained.

    Once ready, you can serve and enjoy this delicious Bulanglang na Gulay dish.

    Ingredients Needed

    To prepare Bulanglang na Gulay from Batangas, gather squash, string beans, eggplant, malunggay leaves, and okra as the key ingredients. These vegetables are essential for creating the flavorful and nutritious dish.

    Squash adds a hint of sweetness, while string beans and okra bring a satisfying crunch. Eggplant provides a creamy texture, and malunggay leaves contribute a unique earthy flavor. Together, these ingredients form a delightful combination of flavors and textures in this traditional Filipino vegetable dish.

    Make sure to select fresh produce for the best results. These ingredients aren’t only tasty but also packed with essential vitamins and minerals, making Bulanglang na Gulay a healthy choice for any meal.

    Cooking Process Explained

    Start by preparing all the vegetables, ensuring they’re fresh and cut into bite-sized pieces for even cooking.

    In a pot, sauté garlic and onion in oil until fragrant. Add tomatoes and cook until they soften.

    Pour in water and bring it to a boil. Once boiling, add the vegetables such as squash, okra, eggplant, and string beans. Let it simmer until the vegetables are tender.

    Season with salt and pepper to taste.

    This Bulanglang recipe provides a glimpse into the traditional Filipino cuisine, specifically from Batangas.

    For a more detailed guide, you can watch Vanjo Merano’s video tutorial, which offers step-by-step instructions for mastering this flavorful dish.

    Serving and Enjoying

    Enhance your dining experience with Bulanglang na Gulay by pairing it with steamed rice for a satisfying meal. The nutritious and flavorful vegetable medley can be served hot, allowing you to savor the vibrant colors and natural goodness of the dish.

    To elevate its presentation, consider garnishing the Bulanglang with chopped spring onions for a fresh and aromatic touch. For a more substantial meal, complement this vegetable dish with fried or grilled fish to add extra flavor and protein.

    Tips for Perfecting the Dish

    For a perfect Bulanglang na Gulay, make sure to select fresh and high-quality vegetables to achieve the best flavors and textures. When cooking, ensure the vegetables are just right – maintaining their crunch and vibrant colors.

    Season the dish with the right amount of salt and pepper to enhance the natural flavors of the vegetables. For a richer taste, consider adding a splash of fish sauce or bagoong to the broth.

    Health Benefits of Bulanglang

    Bulanglang offers a variety of health benefits, making it a nutritious choice for those seeking a wholesome meal. This nutritious dish is rich in fiber, vitamins A, and C, providing essential nutrients and antioxidants. It is a low-calorie option, ideal for individuals watching their calorie intake.

    The inclusion of vitamins A and C in Bulanglang supports overall health and boosts the immune system. Additionally, this dish contains essential minerals that promote well-being and vitality. The dietary fiber present in Bulanglang aids in digestion, ensuring a healthy gut. Enjoy the goodness of Bulanglang not just for its delicious taste but also for its array of health benefits.

    Health Benefits of Bulanglang
    Rich in Fiber Vitamins A Vitamins C
    Supports Digestive Health Boosts Immune System Low in Calories

    Variations and Ingredient Substitutes

    Consider incorporating a variety of vegetables and experimenting with different flavors to enhance your Bulanglang na Gulay experience.

    You can try adding vegetables like ampalaya, labanos, or cabbage to create new textures and tastes in your dish. For ingredient substitutes, consider using vegetable broth instead of water for a richer flavor or swapping bagoong for soy sauce for a different twist.

    To make the dish heartier, you can include protein sources such as shrimp, pork, or fish. For a creamy variation, some recipes suggest adding coconut milk.

    Elevate the flavors by playing with herbs and spices like lemongrass, ginger, or chili peppers.

    Have fun exploring these variations and substitutes to customize your Bulanglang na Gulay to your liking.

    Serving Suggestions and Pairings

    Enhance your dining experience by exploring diverse serving suggestions and pairings for Bulanglang na Gulay. Serve this delightful vegetable dish in a beautiful serving bowl to make it visually appealing.

    For a perfect pairing, consider adding some grilled fish to complement the vegetable flavors, creating a well-rounded meal. Enjoy your Bulanglang na Gulay with a side of steamed rice for a satisfying dining experience.

    To elevate the taste profile, don’t forget to include a side of bagoong (fermented shrimp paste) for that savory umami kick. Whether you’re a vegetarian or simply looking for a light and healthy meal option, the simplicity and freshness of Bulanglang make it a wonderful choice for a balanced and nutritious meal.

    Common Mistakes to Avoid

    What common mistakes should you avoid when preparing Bulanglang na Gulay to ensure a delicious and nutritious dish? Here are three crucial errors to steer clear of:

    1. Overcooking the vegetables: Ensure you don’t leave the vegetables simmering for too long, as this can result in a mushy texture and loss of nutrients.
    2. Adding too much salt: Be cautious with the amount of fish sauce or salt you use, as an excess can overpower the natural flavors of the vegetables.
    3. Not properly washing the vegetables: Make sure to wash the vegetables thoroughly, including the step of rice washing if needed, to avoid a gritty or sandy texture in the dish.

    Origin and Cultural Significance

    To understand the roots and cultural importance of Bulanglang na Gulay, one must explore its origin in Batangas and the traditions that have kept this dish alive through generations.

    Originating in Batangas, a province renowned for its culinary heritage, Bulanglang na Gulay is a beloved vegetable soup served during special occasions. This dish embodies the simplicity and freshness of locally sourced produce, reflecting traditional Filipino cuisine passed down through Batangas generations.

    The cultural significance of Bulanglang na Gulay lies in its connection to local traditions and the celebration of seasonal vegetables. By emphasizing the use of fresh, locally grown ingredients, this dish honors the culinary traditions of the Batangas region and showcases the importance of preserving heritage through food.

    Can I Use the Same Ingredients for Bulanglang Na Gulay and Utan Bisaya Recipe?

    Yes, you can use the same ingredients for bulanglang na gulay and a simple utan bisaya recipe. Both dishes typically include a variety of vegetables such as squash, okra, and eggplant, as well as some kind of protein like shrimp or pork. The key is in the cooking method.

    Frequently Asked Questions (FAQs)

    Wondering about the recipe ingredients and tools needed for making Bulanglang na Gulay?

    Curious about tips for the cooking process to ensure a perfect dish?

    Interested in exploring ideas for flavor variations to customize this classic Batangas dish to your taste preferences?

    Recipe Ingredients and Tools

    You can easily prepare the Bulanglang na Gulay from Batangas by gathering the required ingredients and tools. Here’s what you need:

    1. Ingredients:
    • Squash
    • String beans
    • Eggplant
    • Malunggay leaves
    • Okra
    1. Tools:
    • Cutting board
    • Knife
    • Pot for boiling
    • Utensils for stirring

    Bulanglang na Gulay is a traditional Filipino vegetable soup that’s a healthy choice due to its rich vitamins, minerals, and antioxidants. This Batangas-style recipe offers a simple and fresh way to enjoy a nutritious meal that’s both light and satisfying.

    Cooking Process Tips

    For an enhanced cooking experience with Bulanglang na Gulay from Batangas, consider these valuable tips and FAQs to elevate the flavors and textures of this traditional Filipino vegetable soup.

    Cooking Tips FAQs
    Use fresh vegetables Can I use frozen vegetables?
    Simmer gently How long should I cook the dish?
    Season generously What is the best seasoning mix?
    Stir occasionally Can I add meat to the soup?

    Flavor Variations Ideas

    To enhance the flavors of your Bulanglang na Gulay from Batangas, consider exploring various flavor variations to customize this traditional Filipino vegetable soup. Here are some ideas to inspire your culinary experimentation:

    1. Seafood Twist: Incorporate shrimp or fish to infuse a delightful seafood taste into the dish.
    2. Hearty Addition: For a more substantial meal, try adding pork or beef to bring a savory richness to your Bulanglang na Gulay.
    3. Herbs and Spices: Elevate the flavor profile by experimenting with herbs like lemongrass and ginger, or adding a kick of heat with chili peppers.

    Frequently Asked Questions

    What Is Bulanglang Made Of?

    Bulanglang is made of a variety of vegetables like squash, string beans, eggplant, malunggay leaves, and okra. Boiled together, these veggies create a simple and nutritious dish that represents simplicity, freshness, and local produce.

    What Is the English of Bulanglang?

    The English translation of ‘bulanglang’ is ‘vegetable stew.’ It’s a traditional Filipino dish with various veggies. Known for its simplicity and freshness. Popular in Batangas, it’s a light, nutritious meal showcasing local produce.

    Conclusion

    In conclusion, making Bulanglang Na Gulay from Batangas is a quick and tasty way to enjoy a nutritious Filipino vegetable dish.

    With a few simple ingredients and easy steps, you can create a flavorful and healthy meal that’s perfect for any occasion.

    Whether you’re a fan of traditional Filipino cuisine or looking to try something new, this dish is sure to satisfy your taste buds and provide you with essential nutrients.

    Enjoy!

  • Delicious Ginisang Upo at Kalabasa Recipe in 10 Easy Steps

    Delicious Ginisang Upo at Kalabasa Recipe in 10 Easy Steps

    To create a delicious Ginisang Upo at Kalabasa dish, start by selecting fresh bottle gourds or squash alternatives for optimal taste. Ensure you sauté onions and garlic to build flavorful layers in the dish, then season with soy sauce and pepper to your liking.

    Key Takeaways

    • Select young, firm bottle gourds or squash alternatives for freshness.
    • Sauté onions and garlic to enhance flavor layers in the dish.
    • Season with soy sauce and pepper, adjusting to personal taste preference.
    • Store leftovers properly for convenient reheating and quick meal options.

    Selecting Fresh Upo and Kalabasa

    How can you ensure the best taste for your Ginisang Upo at Kalabasa dish?

    When preparing this Filipino dish that combines ground pork with squash, selecting the freshest ingredients is crucial.

    For the squash component, opt for young bottle gourds with firm, smooth, light green skin, ensuring they’ve no bruises, spots, or discolorations. Look for butternut or calabaza squash as alternatives, as they offer optimal taste.

    Younger bottle gourds are preferred as they’ve edible seeds and a tender texture, enhancing the overall flavor and consistency of the dish.

    Washing and Preparing Vegetables

    When washing and preparing vegetables for your Ginisang Upo at Kalabasa dish, thoroughly rinse the opo squash and butternut squash under running water to remove any dirt or impurities.

    To ensure proper preparation of the squash, follow these steps:

    1. Peel: Use a vegetable peeler or a knife to peel the skin of the squash, getting them ready for slicing.
    2. Remove Seeds: Before slicing the opo squash, make sure to remove the seeds to achieve a smoother texture in the dish.
    3. Slice: Cut the squash into uniform pieces to promote even cooking and maintain a consistent texture in the final dish.

    Following these steps will help you get your squash ready for the delicious Ginisang Upo at Kalabasa dish.

    Sautéing Onions and Garlic

    When sautéing onions and garlic, you’re creating a flavorful aromatic base for your dish. The process releases their natural sweetness and aroma, enhancing the overall taste.

    This fragrant cooking foundation is essential for building layers of flavor in Filipino cuisine.

    Flavorful Aromatic Base

    To infuse your Ginisang Upo at Kalabasa with rich flavors, start by sautéing onions and garlic until fragrant and golden brown. This initial step is essential for building a flavorful aromatic base for your dish. Here’s how to do it effectively:

    1. Heat oil in a pan over medium heat.
    2. Add finely chopped onions and minced garlic to the pan.
    3. Sauté the onions and garlic until they’re soft, translucent, and emit a fragrant aroma.

    Essential Flavor Enhancers

    For a flavorful kick, start by sautéing onions and garlic until they caramelize and release their aromatic essence.

    In Filipino cuisine, onions and garlic are essential flavor enhancers that form the backbone of many dishes, including Ginisang Upo at Kalabasa. Sautéing these ingredients in oil at the right temperature helps unlock their natural sugars, creating a sweet and savory base for your dish.

    The rich aroma of onions and garlic not only adds depth to the flavor profile but also complements the flavors of the squash and pork in this recipe.

    Fragrant Cooking Foundation

    Creating a fragrant cooking foundation in Filipino dishes often starts with sautéing onions and garlic to build depth and aroma in the dish. This process is crucial in developing the rich flavors that are characteristic of Filipino cuisine. Here’s why sautéing onions and garlic is essential:

    1. Depth: The combination of onions and garlic adds layers of flavor to the dish, enhancing its overall taste profile.
    2. Aroma: Properly sautéed onions and garlic release enticing aromas that make the dish more inviting and flavorful.
    3. Flavor Enhancement: Sauteing onions and garlic allows their natural sugars to caramelize, intensifying the dish’s taste and creating a robust foundation for other ingredients to shine upon.

    Adding Upo and Kalabasa Chunks

    When adding Upo and Kalabasa chunks, ensure they’re cut uniformly for even cooking. Bite-sized pieces cook through properly and maintain the dish’s presentation.

    Larger chunks may need more time to cook, while smaller ones can cook faster.

    Upo Preparation Tips

    To ensure even cooking and optimal flavor absorption, cut the upo and kalabasa into uniform, bite-sized chunks when preparing the dish. Here are some tips for preparing the upo and kalabasa chunks:

    1. Uniform Sizes: Cut the bottle gourd and kalabasa into pieces of the same size to promote even cooking.
    2. Bite-Sized: Aim for bite-sized chunks to ensure they cook through evenly and absorb flavors well.
    3. Visually Appealing: Consistently cut upo and kalabasa chunks contribute to a visually appealing presentation and a balanced texture in the dish.

    Kalabasa Cooking Techniques

    For a successful incorporation of upo and kalabasa chunks in your dish, ensure they’re cut into uniform sizes to guarantee even cooking and optimal flavor absorption. Cutting the kalabasa into bite-sized pieces helps make the dish easier to eat and enjoy.

    When adding the upo and kalabasa, timing is crucial to maintain their texture and flavor. Stirring gently after adding the chunks prevents them from breaking apart while cooking. Cooking the upo and kalabasa just until tender ensures they’re cooked perfectly without becoming mushy.

    Seasoning With Soy Sauce and Pepper

    Enhancing your Ginisang Upo at Kalabasa dish with soy sauce and pepper creates a flavorful and well-balanced seasoning profile. Here’s how to season your dish effectively:

    1. Soy Sauce: Adds a savory umami flavor to the dish.
    2. Pepper: Provides a subtle kick of heat and enhances the overall taste.
    3. Combination: The blend of soy sauce and pepper creates a well-balanced seasoning profile.

    Adjust the amount of soy sauce and pepper to suit your personal taste preferences.

    Seasoning with soy sauce and pepper is a common practice in Filipino cuisine, known for adding depth of flavor to dishes.

    Enjoy the rich flavors these seasonings bring to your Ginisang Upo at Kalabasa!

    Simmering Vegetables Until Tender

    Simmer the vegetables until they reach a tender consistency to enhance their flavors and textures. When simmering vegetables like upo and kalabasa, you allow them to absorb the seasonings and spices, creating a dish where all the flavors meld together harmoniously. This method also helps the vegetables release their natural juices, adding depth to the overall taste. By simmering the vegetables until tender, you ensure they are thoroughly cooked and ready to be enjoyed.

    Below is a table highlighting the importance of simmering vegetables in this recipe:

    Simmering Vegetables
    Softens texture
    Enhances flavors
    Absorbs seasonings
    Releases natural juices
    Ensures thorough cooking

    Incorporating Tofu or Tempeh (Optional)

    Consider adding tofu or tempeh to the Ginisang Upo at Kalabasa recipe for a vegetarian or vegan-friendly twist. These plant-based protein options not only enhance the dish’s nutritional value but also provide a meaty texture alternative. Here are some tips to incorporate tofu or tempeh effectively:

    1. Texture: Tofu offers a soft texture, while tempeh provides a firmer, nuttier taste.
    2. Flavor Absorption: Both tofu and tempeh absorb the flavors of the dish well, making them versatile meat substitutes.
    3. Enhanced Profile: Adding tofu or tempeh can elevate the flavor profile of the Ginisang Upo at Kalabasa, appealing to vegetarians and vegans seeking a wholesome meal.

    Garnishing With Spring Onions

    When garnishing with spring onions, consider the different types of onions suitable for garnish and the various cutting techniques to elevate your dish’s presentation.

    Spring onions, with their mild flavor, can complement a wide range of dishes.

    Onion Types for Garnish

    For a fresh and vibrant garnish in your dishes, consider using spring onions, also known as scallions, to add a subtle onion flavor and crisp texture. Spring onions are perfect for garnishing due to their milder flavor and the visual appeal of their green tops.

    Here are some key points about using spring onions for garnish:

    1. Milder Flavor: Spring onions offer a gentler onion taste compared to mature onions, enhancing dishes without overpowering other flavors.
    2. Crisp Texture: The green tops of spring onions provide a fresh and crunchy texture, adding a delightful contrast to various dishes.
    3. Visual Appeal: The vibrant green color of spring onion tops not only enhances the presentation of your dish but also indicates freshness.

    Cutting Techniques for Garnish

    To create an appealing garnish with spring onions, thinly slice them on a bias for an attractive diagonal presentation that enhances the overall look of your dish.

    Spring onions, also known as scallions, not only add color but also bring a mild onion flavor and crisp texture to your meals. The green tops of spring onions are particularly great for garnishing as they offer a fresher, more delicate taste.

    When used as a garnish, spring onions provide a subtle yet impactful flavor that complements a wide variety of dishes, from soups to salads. Their vibrant appearance and refreshing aroma can elevate the presentation of your dish, making it more visually appealing and adding a pop of flavor.

    Serving and Enjoying the Dish

    Wondering how to best savor the flavors of Ginisang Upo at Kalabasa? Here are some tips to enhance your dining experience:

    1. Pair with Complementary Dishes:

    Serve Ginisang Upo at Kalabasa with a side of warm rice to create a satisfying meal. For an added layer of texture and flavor, enjoy it alongside crispy fried fish.

    1. Stay Hydrated:

    Don’t forget to have a bottle of water handy while enjoying this vegetable dish. The hydration will complement the meal and cleanse your palate between bites.

    1. Experiment with Variations:

    Expand your culinary horizons by trying other recipes like Ginisang Upo with Shrimp or Tinolang Manok with Upo to keep your meals exciting and diverse.

    Is the Ginisang Upo at Kalabasa Recipe Easily Adaptable to Include Sardines?

    Yes, the Ginisang Upo at Kalabasa recipe is easily adaptable to include sardines. By simply adding a can of sardines to the traditional recipe, you can create a new flavorful dish that is still based on the easy ginisang upo recipe.

    Storing Leftovers for Later

    Considering how to best prolong the enjoyment of your Ginisang Upo at Kalabasa, let’s now explore how to store any leftovers for later use.

    Leftover Ginisang Upo at Kalabasa can be stored in airtight containers in the refrigerator for up to 3 days. Remember to properly cool the leftovers before storing to maintain freshness and prevent spoilage.

    When ready to enjoy again, reheating the stored leftovers in a saucepan or microwave until thoroughly heated is recommended. This ensures that your meal is safe to consume and delicious as ever.

    Properly stored leftovers not only offer convenience but also provide a quick meal option for the next few days. Always prioritize food safety by avoiding leaving leftovers at room temperature for extended periods to prevent foodborne illnesses.

    Frequently Asked Questions

    What Is the English Translation of Ginisang Upo?

    The English translation of ‘ginisang upo’ is ‘Sautéed Bottle Gourd.’ It’s a common Filipino dish with garlic, onions, and tomatoes. Sometimes, it includes protein like pork or shrimp. Enjoy this flavorful and nutritious meal!

    Do You Remove Seeds of Upo?

    Yes, you should remove the seeds of Upo squash before cooking. Doing so enhances the texture and flavor of the dish. Opt for young Upo with edible seeds for a delicious outcome. Proper preparation is key.

    What Is a Substitute for UPO Vegetables?

    For a substitute for upo vegetables, try using sitaw or sayote. They offer a similar texture and mild flavor. Sitaw adds crunch, while sayote gives a firmer consistency. Both are common in Filipino dishes and enhance sautéed recipes.

    What Does Upo Taste Like?

    Upo squash tastes mildly sweet with a tender yet slightly crisp texture. It absorbs flavors well and releases a subtle earthy aroma when cooked. Pair it with savory ingredients like garlic and tomatoes for a balanced dish.

    Conclusion

    Enjoy the delightful flavors of Ginisang Upo at Kalabasa with this simple and satisfying recipe.

    With just 10 easy steps, you can create a delicious sautéed vegetable dish that’s perfect for any meal.

    Whether you enjoy it on its own or paired with warm rice, this dish is sure to be a hit with your family and friends.

    Try it out today and savor the flavors of Filipino cuisine!

  • Quick Squid Balls and Kangkong Dish How-To Guide

    Quick Squid Balls and Kangkong Dish How-To Guide

    Combine kangkong and squid balls with oyster sauce for a unique flavor blend, serve with steamed rice and chili flakes for a flavorful meal. Enjoy the nutritious elements of kangkong and protein-rich squid balls in this delightful dish.

    Key Takeaways

    • Combine kangkong and squid balls with oyster sauce for a unique flavor blend.
    • Utilize garlic and onion for aromatic complexity in the dish.
    • Serve with steamed rice and chili flakes for a flavorful meal.
    • Benefit from the nutritious elements of kangkong and protein-rich squid balls in this dish.

    Ingredients for Kangkong and Squid Balls

    To create this delectable dish, gather fresh kangkong, squid balls, oyster sauce, garlic, onion, chicken broth, and cornstarch. Kangkong, also known as water spinach, is a popular leafy green vegetable in Filipino cuisine. Its tender leaves and crunchy stems add a unique texture to the dish.

    When cooked, kangkong offers a mild flavor that pairs well with the savory squid balls and aromatic garlic and onion. The combination of kangkong with the seasoned squid balls creates a delightful contrast of flavors and textures.

    With the addition of oyster sauce, chicken broth, and cornstarch to create a flavorful and thickened sauce, this dish will surely satisfy your taste buds.

    Preparing the Kangkong

    For the next step in preparing your Quick Squid Balls and Kangkong dish, focus on readying the kangkong by washing it thoroughly to remove any dirt or impurities.

    Here’s how to prepare the kangkong:

    1. Wash the kangkong: Rinse the kangkong under running water to ensure it’s clean and free of any debris.
    2. Cut the kangkong: Trim the kangkong into 2-inch lengths for easier cooking and serving in your dish.
    3. Nutritious choice: Remember that kangkong is packed with iron and calcium, offering a healthy addition to your meal.

    Making the Squid Balls

    Crafting delectable squid balls involves blending ground squid with a medley of seasonings for a burst of flavor in each bite. To make squid balls, start by cleaning and preparing fresh squid, then grind it into a paste-like consistency.

    Mix the ground squid with ingredients like garlic, salt, pepper, and optional seasonings such as soy sauce or fish sauce to enhance the taste. Form the mixture into small balls, ensuring they hold together well.

    These squid balls can be deep-fried until they turn golden brown, resulting in a crispy exterior and a chewy texture. Making your own squid balls allows you to enjoy a homemade version of this popular street food, packed with protein and customizable to suit your preferences.

    Cooking the Dish

    Heat oil. Sauté garlic and onions until fragrant. Cook the squid balls until golden brown.

    Next, add the kangkong. Stir-fry for 2 minutes until tender yet crisp.

    Preparing the Ingredients

    Start by washing and chopping the kangkong into 2-inch lengths before slicing the squid balls for even cooking. To make your preparation easier and enjoyable, follow these steps:

    1. Organize Your Ingredients: Gather all the necessary items like kangkong, squid balls, garlic, and onion before starting to cook.
    2. Create Flavor: Mince garlic and chop onion to enhance the taste of the dish.
    3. Utilize Oyster Sauce: Incorporate oyster sauce into the recipe for a savory and umami-rich flavor profile.

    Cooking the Squid Balls

    To achieve a satisfyingly crispy texture, begin by frying the squid balls in hot oil until they turn golden brown. Heat oil in a pan and cook the squid balls until they’re golden brown.

    Stir-fry them with garlic and onion for added flavor. Once the squid balls are cooked, add the kangkong to the pan. Cook for about 2 minutes until the kangkong is slightly wilted.

    Pour in the oyster sauce and mix well to coat all the ingredients. Ensure the squid balls are fully cooked and the kangkong is tender but still crisp.

    Once ready, serve the dish hot for a delicious and satisfying meal.

    Stir-Frying Kangkong

    After cooking the squid balls to a golden brown perfection, the next step is to stir-fry the kangkong with garlic, onion, and oyster sauce to create a flavorful and vibrant dish. To make the most of this Kangkong recipe, follow these steps:

    1. Prepare the Kangkong: Wash the kangkong thoroughly and cut it into 2-inch lengths for even cooking.
    2. Sauté with Flavor: Sauté garlic and onion until fragrant before adding the kangkong and squid balls to enhance the dish’s flavor profile.
    3. Cook with Care: Stir-fry the kangkong on medium heat for about 2 minutes to retain its vibrant green color and crispness. Season with salt and oyster sauce for a delightful taste.

    Adding Oyster Sauce

    Enhancing your squid balls and kangkong dish with oyster sauce will infuse a delicious umami richness into the flavors. Oyster sauce, a condiment made from oysters, salt, and water, adds depth and savory notes to various dishes. Its dark brown color and thick consistency make it perfect for coating ingredients, creating a glossy finish.

    Commonly used in Asian cuisine, oyster sauce brings a versatile flavor that complements seafood, meat, and vegetables. When added to the squid balls and kangkong dish, the oyster sauce will contribute a savory element to the overall taste profile. This addition will enhance the dish’s overall flavor, providing a delicious and satisfying meal for you to enjoy.

    Serving Suggestions

    Enhance your dining experience by pairing the squid balls and kangkong dish with steamed rice for a satisfying and complete meal. To elevate the flavors further, consider the following suggestions:

    1. Garnish: Add a sprinkle of toasted garlic on top to introduce a flavorful crunch to each bite.
    2. Spice: For those who enjoy a bit of heat, consider sprinkling chili flakes over the dish to give it a spicy kick.
    3. Versatility: This dish can shine as a delicious main course or serve as a delectable side to complement other dishes on the table.

    Enjoy this meal for lunch or dinner, offering a nutritious and tasty option that’s sure to satisfy your taste buds.

    Nutritional Benefits of Kangkong

    Kangkong offers a rich source of iron, essential for healthy blood circulation, making it a valuable addition to your diet. This leafy green vegetable is low in calories and high in fiber, supporting digestive health.

    Additionally, kangkong contains calcium, promoting bone strength and overall bone health. With its good amount of vitamin C, an antioxidant that helps boost the immune system, kangkong provides a well-rounded nutritional profile.

    It’s a versatile ingredient that can be used in various dishes to add texture and flavor. Including kangkong in your meals not only enhances taste but also delivers numerous health benefits, making it a smart choice for a balanced diet.

    Variations and Substitutions

    To add a creative twist to your dish, consider exploring various substitutions and variations that can elevate the flavors and textures of your squid balls and kangkong recipe. Here are some ideas to help you customize your dish:

    1. Substitute squid balls with fish balls or shrimp balls for a different flavor profile.
    2. Use soy sauce or teriyaki sauce instead of oyster sauce for a unique twist.
    3. Add bell peppers or carrots for added color and texture to the dish.

    These simple changes can bring new dimensions to your dish, making it even more enjoyable for you and your guests.

    Can I Use Squid Balls and Kangkong in Spicy Sizzling Tofu Sisig?

    Yes, you can definitely use squid balls and kangkong in your spicy tofu sisig recipe. These ingredients will add a unique flavor and texture to the dish, making it even more delicious and satisfying. Give it a try and enjoy a flavorful twist on the classic sisig recipe!

    Tips for Cooking Filipino Vegetarian Dishes

    For flavorful and nutritious Filipino vegetarian dishes, incorporating kangkong and squid balls can provide a satisfying meaty texture and umami-rich flavor profile. When cooking Filipino vegetarian dishes, consider using oyster sauce for that extra umami kick and garlic for its aromatic properties.

    Kangkong, rich in iron and calcium, is a great choice for boosting nutritional value. Squid balls, being protein-rich, can offer a meat-like experience without actual meat. Don’t forget to use cooking oil for sautéing ingredients and adding richness to your dish. Below is a table summarizing key ingredients and their benefits when cooking Filipino vegetarian dishes:

    Ingredient Benefits
    Kangkong Rich in iron and calcium
    Squid Balls Protein-rich meaty texture
    Oyster Sauce Adds umami flavor
    Garlic Aromatic properties and health benefits

    Frequently Asked Questions

    What Part of Kangkong Do You Eat?

    You eat the leaves and tender stems of kangkong. They are rich in iron, calcium, and other nutrients. Kangkong is versatile and can be used in dishes like stir-fries, soups, and salads. Wash thoroughly before cooking.

    Can I Use Kangkong Instead of Spinach?

    Yes, you can use kangkong instead of spinach. Kangkong has a slightly crunchy texture and a mild, slightly sweet flavor that works well in various dishes. It’s a nutritious and versatile leafy green to incorporate into your recipes.

    How to Pick Kangkong for Sinigang?

    When picking kangkong for sinigang, choose fresh, vibrant leaves and crisp stems. Avoid wilted or yellowing ones. Check for sliminess or discoloration on the stems to avoid spoilage. Opt for smaller, tender leaves for a delicate texture.

    What Is the Use of Kangkong?

    Kangkong is packed with iron, calcium, and nutrients, making it a healthy choice. It’s versatile – stir-fry, steam, or add to soups. Enjoy its mild, slightly sweet flavor and tender texture when cooked right.

    Conclusion

    In conclusion, this quick squid balls and kangkong dish is a delicious and easy-to-make meal that’s perfect for a quick weeknight dinner.

    With a balance of flavors and textures, this dish is sure to satisfy your taste buds.

    Whether you’re a fan of seafood or looking to try something new, this recipe is a must-try.

    Enjoy this flavorful dish with steamed rice and garnish with toasted garlic and chili flakes for an extra kick.

  • Authentic Adobong Sitaw at Kangkong Recipe Walkthrough

    Authentic Adobong Sitaw at Kangkong Recipe Walkthrough

    You can use the Authentic Adobong Sitaw at Kangkong recipe to cook adobong kangkong perfectly by following the steps and ingredients provided. Enjoy a delicious and authentic dish every time with this recipe.

    Key Takeaways

    • Adobong Sitaw at Kangkong is a nutritious dish rich in fiber, vitamins, and antioxidants.
    • Enhance flavors by prepping aromatics, toasting garlic, and softening onions for a well-balanced sauce.
    • Cook string beans first, then add water spinach for vibrant colors and textures.
    • Customize by adding protein options, experimenting with seasonings, and serving with complementary sides.

    Ingredients for Adobong Sitaw at Kangkong

    To prepare Adobong Sitaw at Kangkong, gather the following essential ingredients: string beans (sitaw), water spinach (kangkong), garlic, onions, soy sauce, and vinegar.

    This traditional Filipino recipe combines the freshness of water spinach with the crunchiness of string beans, creating a nutritious and flavorful dish. The garlic and onions provide a savory base, while the soy sauce and vinegar add a tangy kick to the overall taste.

    Adobong Sitaw at Kangkong is a versatile dish that can be enjoyed as a side dish or as a main course when paired with rice. With these simple ingredients, you can easily recreate this beloved Filipino dish in your own kitchen.

    Preparation of String Beans and Water Spinach

    As you move on to preparing the string beans and water spinach for the Adobong Sitaw at Kangkong recipe, ensure to wash and trim the vegetables before chopping them into bite-sized pieces.

    Here’s how to prepare the string beans and water spinach:

    1. Wash the kangkong stalks and string beans thoroughly under running water.
    2. Trim the ends of the string beans and cut them into 2-inch pieces.
    3. Chop the kangkong stalks into 2-inch lengths as well.

    Sauteing the Aromatics for Adobo Sauce

    When sauteing the aromatics for your adobo sauce, remember to soften the garlic and onion until they’re tender.

    Toasting the garlic can add a rich layer of flavor to your dish.

    Make sure to achieve a well-balanced sauce by softening the onion before adding other ingredients.

    Onion and Garlic

    Ensure your pan is preheated before adding a generous amount of oil for sautéing the onion and garlic. Sautéing these aromatics is crucial for developing the rich flavors in your adobo sauce. Here’s how to do it effectively:

    1. Softening: Sautéing the onion and garlic helps soften them, unlocking their natural sweetness.
    2. Flavor Enhancement: The process of toasting garlic adds a deep, nutty flavor that enhances the overall taste of the dish.
    3. Building Depth: Aromatics like garlic and onion are fundamental in creating layers of flavor in Filipino adobo, making them a vital base for your sauce.

    Enhancing Flavor Profile

    For a flavorful adobo sauce, start by heating your pan and adding a generous amount of oil to sauté the onion and garlic. Sautéing garlic and onion releases their natural oils and sweetness, enhancing the sauce’s flavor profile. Toasting the garlic adds a nutty depth to the sauce, while softening the onion before adding water, soy sauce, and vinegar creates a balanced and savory base.

    When you incorporate chicharon into the sauce, it provides a rich flavor and crunchy texture to the dish. Remember to add the sitaw before the kangkong to ensure that the string beans cook properly, as they require a longer cooking time.

    These steps will help you achieve a delicious and authentic Adobong Sitaw at Kangkong dish.

    Adding Sitaw and Kangkong to the Pan

    Now it’s time to add the sitaw and kangkong to the pan.

    Start by putting the sitaw first, as it needs more time to cook properly.

    Then, add the kangkong, taking care not to overcook it to maintain its vibrant color and texture.

    Adding Sitaw First

    Start by adding the sitaw, or string beans, to the pan as they require a longer cooking time compared to kangkong. This sequence is crucial to ensure that each ingredient is cooked perfectly and absorbs the flavors of the dish.

    Here’s how you should proceed:

    1. Add the sitaw: Allow the string beans to soften and soak up the savory adobo flavors.
    2. Stir occasionally: Ensure the sitaw is evenly coated and cooked through.
    3. Prepare for kangkong: Once the sitaw is slightly tender, you can then add the kangkong to the pan.

    Kangkong Follows Suit

    Add the kangkong to the pan once the sitaw has softened slightly and absorbed the flavors, continuing to cook until both vegetables are tender. Kangkong, a type of water spinach common in Filipino cuisine, complements the Adobong Sitaw dish beautifully. This vegetable not only adds vibrant colors to the meal but also introduces its unique flavors and textures.

    Seasoning and Simmering the Dish

    For a savory and tangy flavor profile, season the Adobong Sitaw at Kangkong with soy sauce, vinegar, and garlic before allowing the dish to simmer and fully infuse the flavors into the string beans and water spinach.

    1. Infuse Flavor: Allow the dish to simmer to fully infuse the flavors of the seasonings into the string beans and water spinach.
    2. Tenderize Vegetables: The simmering process helps tenderize the vegetables while enhancing the overall taste of the dish.
    3. Enhance Richness: Simmering allows the pork cracklings to soften slightly and absorb the flavors of the dish, adding a rich and meaty element.

    Remember to stir occasionally during simmering to ensure even distribution of the seasonings and to prevent sticking. This step is crucial in bringing out the delicious taste of this authentic Filipino dish.

    Garnishing and Serving Suggestions

    When it comes to garnishing and serving your Adobong Sitaw at Kangkong, think about adding crispy pork cracklings for a delightful crunch.

    Sprinkle some chopped green onions or cilantro to bring a fresh and colorful element to your dish.

    Don’t forget to squeeze some calamansi or lemon juice for that extra zing before you dig in.

    Garnish Ideas

    Enhance the presentation and flavor of your Adobong Sitaw at Kangkong by garnishing it with crispy fried garlic, freshly chopped spring onions, and a sprinkle of red chilies or chili flakes for a spicy kick.

    1. Crispy Fried Garlic: Add a delightful crunch and aromatic garlic flavor to your dish.
    2. Freshly Chopped Spring Onions: Provide a burst of color and a hint of mild onion taste.
    3. Red Chilies or Chili Flakes: Infuse your Adobong Sitaw at Kangkong with a fiery heat that tantalizes the taste buds.

    These garnishes not only elevate the visual appeal of your dish but also contribute to a harmonious blend of flavors that will make your Adobong Sitaw at Kangkong a memorable culinary experience.

    Plating Tips

    To enhance the overall appeal of your Adobong Sitaw at Kangkong, consider incorporating these plating tips for a visually stunning presentation. Garnish the Filipino vegetable dish with crispy pork cracklings to add texture and flavor. Serve it in a traditional Filipino bowl or plate for an authentic touch. For a pop of color and freshness, sprinkle freshly chopped spring onions or cilantro on top. Here is a table summarizing the plating tips:

    Plating Tips Description
    Crispy Pork Cracklings Add texture and flavor
    Traditional Filipino Bowl or Plate Authentic presentation
    Freshly Chopped Spring Onions or Cilantro Color and freshness
    Spicy Vinegar or Soy Sauce with Calamansi Dipping sauce

    Serving Suggestions

    For an appetizing touch to your Adobong Sitaw at Kangkong, consider sprinkling a generous amount of crispy pork cracklings on top.

    To enhance the serving of this Filipino vegetable dish, follow these suggestions:

    1. Serve the dish hot over steamed rice for a satisfying and complete meal.
    2. Drizzle some extra vinegar on top for a tangy kick.
    3. Add a sprinkle of chopped green onions or spring onions for a pop of color and freshness.

    Pair the Adobong Sitaw at Kangkong with a side of sliced tomatoes and onions for a refreshing contrast. These serving suggestions will elevate the flavors and presentation of your dish, making it a delightful meal for everyone to enjoy.

    Nutritional Value of Adobong Sitaw at Kangkong

    Including Adobong Sitaw at Kangkong in your diet can significantly boost your intake of essential nutrients like fiber, vitamins, and minerals.

    This dish is a rich source of fiber, which aids in digestion and helps you feel full longer. The sitaw (string beans) and kangkong (water spinach) in Adobong Sitaw at Kangkong provide a good amount of protein, essential for muscle growth and repair.

    Additionally, it’s low in carbohydrates, making it a suitable option for those monitoring their carb intake. The combination of sitaw and kangkong also enhances the dish’s antioxidant content, contributing to overall health and well-being.

    Tips for Perfect Adobo-style Vegetables

    Boost the flavor of your Adobong Sitaw at Kangkong by mastering these essential tips for achieving perfect adobo-style vegetables.

    1. Sauté garlic and onion until soft: Create a flavorful base for your Filipino vegetable dish by sautéing garlic and onion until they’re soft and fragrant.
    2. Add chicharon for flavor and crunch: Enhance the taste and texture of the dish by incorporating chicharon, which not only adds flavor but also provides a satisfying crunch.
    3. Cook sitaw and kangkong correctly: When cooking sitaw and kangkong together, start with sitaw as it requires a longer cooking time. Adding kangkong later ensures a well-balanced and perfectly cooked dish.

    Variations and Substitutions for the Recipe

    Enhance the flavor profile of your Adobong Sitaw at Kangkong by incorporating additional protein options like pork, shrimp, or tofu for a heartier meal.

    If kangkong is unavailable, consider substituting it with spinach or malunggay.

    To create a vegetarian version, simply omit the meat and introduce mushrooms or tofu for a satisfying dish.

    Experiment with seasonings like fish sauce, oyster sauce, or chili flakes to tailor the taste to your liking.

    For a healthier rendition, opt for low-sodium soy sauce and add more vegetables such as bell peppers or carrots to boost the nutritional content of the meal.

    These variations and substitutions allow you to customize the Adobong Sitaw at Kangkong recipe to suit your preferences and dietary needs.

    Can I Use Your Adobong Sitaw at Kangkong Recipe for Cooking Adobong Kangkong Perfectly?

    Yes, you can use our Adobong Sitaw at Kangkong recipe for cooking adobong kangkong perfectly. Simply follow the steps and ingredients in our recipe to ensure a delicious and authentic dish. With our recipe, you’ll be able to enjoy cooking adobong kangkong perfectly every time. Adobong kangkong is a traditional Filipino dish that is loved by many for its savory flavors and health benefits. By using our Adobong Sitaw at Kangkong recipe, you can easily recreate this classic dish at home and impress your family and friends with your cooking skills. Whether you’re a beginner or a seasoned cook, our recipe will guide you through the process of making a delicious adobong kangkong that stays true to its traditional Filipino roots.

    Frequently Asked Questions About Adobong Sitaw at Kangkong

    Have questions about making Adobong Sitaw at Kangkong? Here are some commonly asked questions about this Filipino vegetable dish:

    1. Is Adobong Sitaw at Kangkong easy to prepare?

    Yes, this dish is relatively easy to make with simple ingredients and straightforward cooking techniques.

    1. Can I add pork rinds to Adobong Sitaw at Kangkong?

    Absolutely! Adding pork rinds can enhance the flavor and provide a crunchy texture to the dish.

    1. Are there any variations to the traditional Adobong Sitaw at Kangkong recipe?

    While the traditional recipe calls for string beans and water spinach, you can customize it by adding proteins like pork, shrimp, or tofu to suit your taste preferences.

    Frequently Asked Questions

    How to Cook Adobo in 5 Steps?

    To cook adobo in 5 steps, start by sautéing garlic and onion, then add soy sauce, vinegar, water. Include sitaw, kangkong, let it cook till tender. Finish with pork cracklings. Enjoy your flavorful adobo!

    What Is the Origin of Adobong Kangkong?

    Adobong Kangkong originated in the Philippines, blending adobo’s savory tanginess with water spinach. It’s a versatile dish enjoyed as a main or side, often with rice. Its simple preparation and rich flavors appeal to many Filipino households.

    Conclusion

    In just a few simple steps, you can create a delicious and nutritious dish with the Authentic Adobong Sitaw at Kangkong Recipe Walkthrough.

    With flavorful aromatics, tender string beans and water spinach, and a savory adobo sauce, this dish is sure to please your taste buds.

    Try out this recipe for a taste of traditional Filipino cuisine that’s perfect for any meal or gathering!

  • Langka in 3 Easy Steps: From Fresh Fruit to Sweet Jam with a Secret Twist

    Langka in 3 Easy Steps: From Fresh Fruit to Sweet Jam with a Secret Twist

    Prepare langka by cutting, deseeding, peeling, and rinsing for various recipes. Cook langka by boiling, stir-frying, grilling, or in stews and desserts. Add a secret ingredient to elevate your homemade jam for a richer, more complex flavor.

    Key Takeaways

    • Prepare langka by cutting, deseeding, peeling, and rinsing to get ready for cooking or eating.
    • Cook langka by boiling, stir-frying, grilling, or adding to stews, curries, and desserts for a unique tropical taste.
    • Boost your langka jam with a secret ingredient — a touch of brown sugar and a pinch of cinnamon — for deeper flavor and aroma.
    • Enjoy langka in salads, smoothies, savory dishes, or roasted seeds for added nutrition and flavor.

    Preparing the Langka

    Start by selecting a ripe but firm langka fruit. Cut it in half and remove the core and seeds. The inside flesh is soft and juicy — perfect for cooking. Use a spoon to gently scoop out the flesh and discard any fibrous parts. Peel off the tough outer skin with a knife or your hands. Rinse the langka pieces well under cold water to remove sticky sap. This step is vital — it prevents a bitter taste and keeps your dish clean and smooth.

    Once peeled and rinsed, the langka is ready to be cooked or used in recipes. The texture changes when cooked — it becomes soft and almost creamy, making it ideal for both savory and sweet dishes.

    Cooking the Langka Dish

    Boil the langka pieces in water for 10–15 minutes until soft. Then drain and set aside. For a savory dish, stir-fry the boiled langka with garlic, onions, and a splash of soy sauce. Add a bit of coconut milk to deepen the flavor. This makes a hearty, plant-based dish that works well as a side or main.

    For a tropical twist, roast the langka slices in the oven with a little oil and spices like nutmeg or black pepper. This brings out a natural sweetness and a caramelized edge.

    Try adding langka to a classic Filipino stew like ginisang munggo — it adds a subtle sweetness and texture that balances the earthy mung beans. You can also blend cooked langka into smoothies or use it in desserts like custard or ice cream.

    Can I Use Langka in Ginisang Munggo to Add Flavor?

    Yes, you can use langka in ginisang munggo to add a tropical depth of flavor. When added early in the cooking process, the langka softens and blends with the mung beans and vegetables, creating a harmonious balance of sweet and savory. Try it with a splash of coconut milk and a pinch of salt to enhance the overall taste. This small addition makes the dish more interesting and authentic to modern Filipino cooking.

    Serving and Enjoying Langka

    Savor langka in many ways — fresh, cooked, or preserved. Add it to salads for a tropical crunch and sweetness. Blend it into smoothies with banana, coconut milk, and a touch of honey for a creamy, refreshing drink.

    Use cooked langka in curries, soups, or as a meat substitute in vegan dishes. Roast the seeds for a crunchy snack — they’re rich in protein and fiber.

    For a sweet treat, try making traditional jackfruit candy in the Philippines. Cook ripe langka with brown sugar and a hint of vanilla until it thickens. Cool and cut into small pieces. Coat with a sugar glaze for a chewy, tropical finish.

    Frequently Asked Questions

    How Do You Prepare Jackfruit?

    To prepare jackfruit, cut it in half, remove the core and seeds, then separate the flesh from the skin. Chop into small pieces. Be cautious of the sticky sap — it can stain and irritate skin. Use gloves if needed. Cook or eat fresh, depending on your recipe.

    How to Cook Jackfruit Like Meat?

    Use young, unripe jackfruit for a meat-like texture. Season with salt, pepper, and spices. Cook by grilling, baking, or simmering in sauces. It absorbs flavors well and makes a great plant-based alternative to meat in curries or stews.

    What Can You Do With Jackfruit?

    You can enjoy jackfruit fresh, cooked, canned, or preserved. Try it in curries, stir-fries, salads, desserts, and as a meat substitute. It’s a versatile fruit that fits into many cuisines, especially Southeast Asian and Filipino cooking.

    How to Make Jackfruit Candy in the Philippines?

    To make jackfruit candy in the Philippines, cook ripe jackfruit with brown sugar and a pinch of cinnamon until it becomes thick and sticky. Let it cool, then cut into small pieces. Optionally, coat with a sugar syrup or glaze for a glossy finish. This traditional treat is popular during festivals and family gatherings.

    Conclusion

    Making langka jam at home is easier than you think — and the secret ingredient (brown sugar and cinnamon) makes all the difference. Whether you’re cooking a simple stir-fry or making a sweet Filipino candy, langka adds a unique tropical flavor that stands out.

    With just a few steps and common ingredients, you can enjoy the natural sweetness and health benefits of this tropical fruit. Try it in your next meal — it’s a delicious, easy, and nutritious addition to your kitchen repertoire.

  • Ampalaya Con Carne Made Simple: Follow This Recipe Cook Savory Ginataang

    Ampalaya Con Carne Made Simple: Follow This Recipe Cook Savory Ginataang

    To make Ampalaya Con Carne, a savory ginataang dish, follow this simple recipe:

    1. Gather ingredients: Ampalaya (bitter melon), ground pork, onion, garlic, tomato sauce, and coconut milk.
    2. Cook the ingredients: Sauté the onion and garlic, then add the ground pork. Once the pork is cooked, add the tomato sauce and coconut milk. Finally, add the sliced ampalaya and cook until tender.

    Enjoy your savory ginataang dish!

    Key Takeaways

    • Ampalaya Con Carne combines savory beef with bitter gourd for a unique flavor profile.
    • This dish is a good source of protein, vitamins, and minerals.
    • Pair Ampalaya Con Carne with steamed rice for a satisfying meal.
    • Enhance the flavors by marinating beef, sautéing aromatics, and balancing bitter and sweet notes.

    What Is Ampalaya Con Carne?

    Delving into the culinary world of Filipino cuisine, you’ll find Ampalaya Con Carne, a delectable dish featuring thinly sliced beef and bitter gourd cooked in a savory sauce. This Filipino favorite combines the distinct bitter notes of ampalaya with the savory flavors of stir-fried beef, creating a harmonious balance of tastes.

    The nutritious aspect of this dish can’t be overlooked, as it offers a good source of protein, vitamins, and minerals. The tender beef complements the slightly bitter ampalaya, resulting in a unique and flavorful eating experience.

    Ampalaya Con Carne is a popular lunch choice in many Filipino households, often paired with steamed rice to complete the meal.

    Ingredients Needed for the Recipe

    To prepare the Ampalaya Con Carne recipe, gather essential ingredients like beef sirloin, ampalaya, ginger, garlic, onion, soy sauce, oyster sauce, sugar, sesame oil, and cornstarch. Check out the table below for a quick overview of the key components you’ll need:

    Ingredients
    Beef Sirloin
    Ampalaya (Bitter Gourd)
    Ginger
    Garlic
    Onion
    Soy Sauce
    Oyster Sauce
    Sugar
    Sesame Oil
    Cornstarch

    These ingredients come together to create a delicious and nutritious Filipino dish that combines the richness of beef with the unique flavor of ampalaya, offering a balance of taste and texture.

    Step-By-Step Cooking Instructions

    Let’s walk through the recipe process step by step, highlighting key points to ensure a successful dish.

    From preparing the ingredients to the cooking methods and tips for enhancing flavors, each detail plays a crucial role in creating a delicious Ampalaya Con Carne.

    Stay tuned for a straightforward guide that will help you master this simplified recipe and enjoy a flavorful meal.

    Recipe Ingredient Preparation

    Marinate your beef with a blend of seasonings and spices to enhance both its flavor and tenderness.

    • Saute aromatics like garlic, ginger, and onion for a flavorful base.
    • Rub salt on bitter gourd slices to reduce bitterness before cooking.
    • Stir-fry marinated beef until fully cooked for a delicious texture.
    • Thicken the sauce with water and cornstarch to create a savory coating for the dish.

    Cooking Method Details

    After marinating the beef and preparing the ingredients, proceed to heat a pan over medium heat for the next step in cooking the Ampalaya Con Carne dish.

    Saute aromatics like garlic, ginger, and onion until fragrant. Then, add the marinated beef and stir-fry until fully cooked.

    Next, reduce the bitterness of the ampalaya by rubbing salt on slices and letting them sit for a few minutes. Add the bitter gourd to the pan and stir-fry until slightly tender.

    Flavor Enhancement Tips

    Enhance the flavors of your Ampalaya Con Carne dish by infusing the marinated beef with a blend of oyster sauce, soy sauce, sesame oil, salt, and pepper. To make your dish truly savory and delicious, follow these flavor enhancement tips:

    • Marinating: Allow the beef to soak up the rich flavors of oyster sauce, soy sauce, sesame oil, salt, and pepper.
    • Searing: Achieve a deliciously browned exterior on the beef by searing it in a hot skillet.
    • Sauteing: Combine onions, garlic, and ampalaya in a pan to let the flavors meld beautifully.
    • Thickening: Create a perfect sauce by adding a mixture of water, soy sauce, oyster sauce, sugar, and cornstarch to thicken the dish to perfection.

    Following these steps will result in a balanced blend of bitter and sweet flavors in your Ampalaya Con Carne.

    Tips for Enhancing the Dish’s Flavor

    To enhance the flavor of your ampalaya con carne, consider adding flavor-boosting ingredients. Utilize specific cooking techniques and pay attention to the presentation of the dish. These elements can elevate the taste profile and overall experience of the meal, making it more enjoyable for you and your guests.

    Experiment with different ingredients and methods to find the perfect balance of flavors that suits your preferences.

    Flavor-Boosting Ingredients

    For a more robust and flavorful Ampalaya Con Carne, infuse your dish with a blend of oyster sauce, soy sauce, sesame oil, and a hint of sugar in the sauce.

    To enhance the taste further, incorporate aromatics like ginger, garlic, and onion for depth of flavor.

    Utilize cornstarch to thicken the sauce, creating a velvety texture that coats the ingredients perfectly.

    Balancing the bitter flavor of ampalaya with the sweet and savory elements such as oyster sauce and sugar can elevate the overall taste profile of the dish, making it a delightful experience for your taste buds.

    Cooking Techniques

    Infusing your dish with a blend of flavor-boosting ingredients like oyster sauce and soy sauce can enhance the overall taste of your Ampalaya Con Carne. To achieve a juicy texture, use the velveting technique to tenderize the beef.

    Saute aromatics until fragrant to add depth of flavor to your dish. Remember to adjust seasoning with ground pepper and serve with steamed rice for a complete meal.

    Reduce the bitterness of ampalaya by rubbing it with salt before cooking. To balance out the bitter taste further, consider adding a hint of sugar while cooking. These techniques won’t only improve the taste but also elevate the overall enjoyment of your Ampalaya Con Carne.

    Presentation Matters

    Enhance the appeal of your Ampalaya Con Carne by incorporating fresh herbs and vibrant garnishes to elevate its visual and flavor impact. Consider these tips to enhance the presentation and flavor of your dish:

    • Garnish with Fresh Herbs: Sprinkle chopped cilantro or green onions on top for a burst of color and freshness.
    • Experiment with Ingredients: Try adding a touch of sweetness like a sprinkle of sugar to balance the bitter notes of the ampalaya.
    • Marinate the Beef: Infuse the meat with soy sauce, sesame oil, and other seasonings to add richness and depth of flavor.
    • Serve with Rice: Pair your savory Ampalaya Con Carne with a side of steamed rice to complement the dish’s flavors perfectly.

    Health Benefits of Ampalaya Con Carne

    By combining beef with ampalaya, you can enjoy a nutritious dish that offers a range of health benefits. Ampalaya con Carne is rich in protein from the beef, essential for muscle growth and repair.

    The inclusion of ampalaya provides a good dose of Vitamin C, known for its immune-boosting properties. This dish also contains various minerals that contribute to overall health.

    The balance of flavors and textures in Ampalaya con Carne makes it not only delicious but also a wholesome addition to your diet. Including this dish in your meals can help you maintain a well-rounded and nutritious eating plan, making it a smart choice for your overall well-being.

    Serving Suggestions and Accompaniments

    For a satisfying meal pairing, consider serving Ginisang Ampalaya with fried fish like tilapia or bangus. This versatile side dish can elevate your dining experience with its healthy and delicious qualities.

    When serving Ginisang Ampalaya, try these accompaniments to enhance your meal:

    • Fried chicken: Crispy on the outside, juicy on the inside, a perfect contrast to the flavorful bitterness of the ampalaya.
    • Breaded pork chops: The crunchy coating of the pork chops complements the soft texture of the ampalaya.
    • Lechon kawali: The crispy skin of the lechon kawali pairs harmoniously with the savory ampalaya.
    • Camaron rebosado: The shrimp dish adds a seafood element that balances the vegetable’s taste.

    How Can I Make Ginataang Dishes More Flavorful and Savory, Like Ampalaya Con Carne?

    To make ginataang dishes more flavorful and savory, like Ampalaya Con Carne, try using the ginataang hipon sitaw recipe. The combination of creamy coconut milk, shrimp, and string beans creates a rich and delicious base that can enhance the flavor of any dish.

    Variations and Alternative Recipes

    When exploring variations and alternative recipes for Ampalaya con carne, consider incorporating different ingredients to add depth and complexity to the dish.

    Ampalaya, known for its bitter taste, can be sautéed to mellow the bitterness. Ampalaya con carne, a Filipino dish featuring sautéed bitter melon slices with beef, is an acquired taste for some.

    To customize this dish with variations, try combining beef with sotanghon noodles for a unique twist. Some enthusiasts enjoy the combination of ampalaya and sotanghon to balance the bitterness and enhance the overall flavor profile.

    Readers’ feedback often emphasizes the vibrant colors and delicious taste that result from these personalized additions and alterations, contributing to the diversity of Filipino cuisine.

    Frequently Asked Questions

    How Do You Remove Bitterness From Ampalaya When Cooking?

    To remove bitterness from ampalaya when cooking, soak slices in salted water or rub with salt. Avoid salting before cooking to retain nutrients. Remove seeds and pith. Consider adding a touch of sugar for balance.

    How Long to Soak Ampalaya in Salt Water?

    Soak ampalaya in salted water for 15-30 minutes to reduce bitterness. Some suggest up to an hour for max effect. The salt draws out bitter compounds. Rinse slices well after soaking to remove excess salt. Timing varies per preference.

    What Is Ampalaya in English?

    In English, ampalaya is known as bitter melon or bitter gourd. It has a slightly bitter taste and is used in various cuisines for its health benefits. Try incorporating this nutrient-rich ingredient into your meals!

    Is Ginisang Ampalaya Good for Diet?

    Yes, Ginisang Ampalaya is good for your diet. It’s low in calories, high in essential nutrients like Vitamin A and C, and aids in blood sugar control. Including it can support your weight management and health goals.

    Conclusion

    In conclusion, Ampalaya Con Carne is a delicious Filipino dish that combines the bitterness of bitter gourd with the savory sweetness of beef in a flavorful sauce.

    With simple ingredients and easy cooking instructions, this dish is a great addition to any meal.

    Try making it at home for a tasty and satisfying dining experience!

  • What Is the History Behind Laing Na Gabi?

    What Is the History Behind Laing Na Gabi?

    Laing na gabi, a Filipino dish of taro leaves in coconut milk, likely originated in the Bicol region of the Philippines. It is known for its distinctive flavor and is a well-loved dish among Bicolanos. The name “laing” itself might be derived from the Tagalog word “lahing,” meaning “long” or “tall,” potentially referring to the long strands of taro leaves.

    History and Origins:

    Bicol Region:
    Laing is a traditional dish of the Bicol region, known for its coconut-based dishes and use of chilies.
    Gabi (Taro):
    The dish features gabi leaves, which are a staple ingredient in Bicol cuisine.
    Coconut Milk:
    Coconut milk is a crucial component, adding creaminess and flavor to the dish.
    Spices:
    The dish is often spiced with labuyo chilies, ginger, and other aromatics.
    Pinangat:
    In the Bicol region, laing is also known as pinangat, a term referring to the dish wrapped in gabi leaves.
    No-Stirring Tradition:
    There’s a belief that stirring the laing (especially stirring the gabi leaves into the coconut milk) can cause an itchy sensation in the mouth. This belief is passed down through generations of home cooks.

    Origins of Laing Na Gabi

    Laing Na Gabi, a beloved dish in the Bicol region of the Philippines, has its origins deeply rooted in the culinary traditions of the local community. This classic dish is crafted using taro leaves, which are dried or withered, creating a unique texture and taste.

    The heart of Laing Na Gabi lies in the use of rich and creamy coconut milk, infusing the dish with a luscious flavor that’s distinctive to the Bicol region. The combination of tender taro leaves and aromatic coconut milk forms the base of this flavorful creation, complemented by the addition of chili peppers, ginger, and garlic for a perfect balance of heat and spice.

    Laing Na Gabi stands as a testament to the culinary creativity and expertise of the Bicolanos.

    Influence of Taro Leaves in Cuisine

    Taro leaves, a versatile ingredient in Filipino cuisine, play a crucial role in enhancing the flavors of traditional Bicolano dishes like Laing. Here’s how taro leaves influence the cuisine:

    • Taro leaves, known as gabi in Filipino cuisine, are a staple ingredient in dishes like Laing.
    • Taro leaves add a unique flavor and texture to Laing, enhancing the dish’s overall taste.
    • The use of taro leaves in Laing dates back to traditional Filipino cooking practices in the Bicol region.
    • Taro leaves are carefully prepared to remove toxins and enhance their palatability in dishes like Laing.

    These factors highlight the significance of taro leaves in Bicolano cuisine, especially in the preparation of dishes like Laing.

    Evolution of Laing Recipe

    As culinary preferences shifted and palates evolved, the traditional Bicolano cuisine witnessed a subtle yet significant transformation in the way dishes like Laing were prepared and enjoyed. Originally, Laing recipe used dried taro leaves, coconut milk, and chili peppers to create a rich and spicy flavor profile.

    However, the evolution of this dish has led to various adaptations, including the addition of ingredients such as seafood, meat, or even vegetarian options. Some versions even incorporate elements from the famous Bicol Express dish, known for its fiery taste.

    Despite these changes, Laing’s essence as a coconut milk-based dish with a kick of spice remains at the core of its evolution, showcasing the adaptability of Filipino cuisine to different tastes.

    Cultural Significance of Laing

    Highlighting its role in Filipino culinary traditions, the cultural significance of Laing extends beyond its flavorful composition. Laing holds a special place in Bicolano cuisine and Filipino culture, symbolizing the rich culinary heritage of the Bicol region. Its importance is evident in various aspects:

    • Coconut Milk: Laing’s use of coconut milk showcases the Bicolanos’ expertise in incorporating this ingredient into their dishes.
    • Bicolano Cuisine: The dish represents the heart of Bicolano cuisine, known for its bold flavors and spicy undertones.
    • Spicy Food: Laing exemplifies the Filipino love for spicy food, making it a staple in celebrations and gatherings.
    • Cultural Relevance: Serving Laing during special occasions highlights its cultural significance, connecting people to their roots and traditions.

    Regional Variations in Laing Preparation

    When exploring the regional variations in Laing preparation, one can discover a diverse array of dishes that showcase the unique flavors and ingredients of different Filipino regions.

    In Bicol, for example, Laing is traditionally made with gabi leaves cooked in rich coconut milk. However, other regions have their own take on this classic dish.

    In Camalig, Albay, you might find inulukan, a version of Laing made with river crabs. Aklan’s linapay or tinamuk features freshwater shrimp in coconut milk, adding a distinct twist.

    Tinumok, a Bicolano specialty, wraps taro leaves around a mixture of shrimp, fish flakes, and coconut meat, creating a flavorful variation. These regional adaptations demonstrate the versatility of Laing in incorporating local ingredients and culinary practices.

    How Are Laing Na Gabi and Ginisang Puso Ng Saging Related in Filipino Cuisine?

    Laing na gabi and ginisang puso ng saging recipe are related in Filipino cuisine as they both use taro leaves as a main ingredient. Laing na gabi is a spicy dish cooked in coconut milk with dried taro leaves, while ginisang puso ng saging recipe is a sautéed dish made with banana blossoms.

    Laing Na Gabi in Modern Times

    You might be interested to know that Laing na Gabi has adapted to modern times with various protein options like pork, shrimp, or dried fish. These contemporary twists have added new dimensions to this traditional Filipino dish.

    Additionally, the dish’s popularity in cuisine, regional variations, and potential health benefits are noteworthy aspects to explore.

    Popularity in Cuisine

    Laing na Gabi has become a beloved and widely embraced dish in modern Filipino cuisine due to its rich, spicy flavors originating from the Bicol region. It features taro leaves cooked in coconut milk, highlighting the Bicolano love for chili peppers and creamy textures. This dish has gained popularity in Filipino households and restaurants, showcasing the versatility and appeal of Bicolano cuisine.

    Laing na Gabi’s combination of ingredients creates a unique and flavorful experience that has made it a staple in contemporary Filipino cooking.

    • Taro leaves cooked in coconut milk
    • Highlighting the Bicolano love for chili peppers
    • Showcasing the versatility and appeal of Bicolano cuisine
    • A unique and flavorful experience in contemporary Filipino cooking

    Regional Variations

    In modern times, regional variations of this Bicolano dish, Laing na Gabi, showcase diverse culinary interpretations across different Filipino communities.

    While the traditional recipe includes taro leaves, coconut milk, and chili peppers, contemporary adaptations introduce variations such as the addition of different types of meat or seafood like shrimp, pork, or dried fish. These adjustments in ingredients cater to varying tastes and preferences, allowing for a broader range of flavors within the dish.

    Moreover, the level of spiciness in Laing na Gabi may be modified to suit regional preferences, highlighting the adaptability of the recipe. These regional variations emphasize the versatility and creativity in incorporating local ingredients and cooking styles into this beloved Filipino dish.

    Health Benefits

    With a myriad of health benefits, the modern iteration of Laing na Gabi stands out as a nutritious dish that combines various advantageous ingredients for overall well-being.

    Taro leaves in Laing na Gabi are rich in fiber, promoting digestive health.

    The coconut milk in Laing na Gabi provides healthy fats for energy and satiety.

    Chili peppers in Laing na Gabi contain capsaicin, known for its potential metabolism-boosting effects.

    Additionally, garlic and ginger in Laing na Gabi offer anti-inflammatory and immune-boosting properties.

    This combination of ingredients not only creates a flavorful dish but also contributes to a balanced diet that supports digestive health, energy levels, metabolism, and overall wellness.

    Frequently Asked Questions

    What Is the Origin and History of Laing?

    Laing has its roots in Bicolano cuisine, featuring spicy, creamy flavors. It consists of taro leaves, coconut milk, and chili peppers. Laing, also known as pinangat, showcases Filipino culinary diversity with regional variations like Inulukan and Linapay.

    What Is the History of Bicol Express?

    Bicol Express originated in the Bicol region of the Philippines, known for its spicy stew made with pork, shrimp, or fish in coconut milk with shrimp paste and chili peppers. It symbolizes the bold flavors of Bicolano cuisine.

    What Is Laing the Most Famous Food From Bicol?

    Laing, the most famous Bicolano dish, features chili and coconut milk. Made with dried taro leaves, it’s a flavorful delight. Bicolanos love it for its unique taste and texture. Laing, also known as pinangat, is a staple in Bicol cuisine.

    What Is the Meaning of Laing?

    Laing is a Bicolano dish made of taro leaves, coconut milk, and spices. In Tagalog, Laing means dried or withered leaves. It’s known for its spicy kick and creamy texture, a delicious blend of flavors.

    Conclusion

    In conclusion, the history of laing na gabi is deeply intertwined with Filipino culinary heritage, particularly in the Bicol region.

    This traditional dish showcases the unique flavors of taro leaves, coconut milk, and spices, reflecting the region’s love for heat and richness in their cuisine.

    Over time, laing has evolved and become a beloved Filipino favorite, enjoyed by many for its authentic and flavorful taste.

  • How to Make Ginisang Repolyo With Chicken in 10 Easy Steps

    How to Make Ginisang Repolyo With Chicken in 10 Easy Steps

    Saute onions and garlic for flavor, cook chicken with seasonings, and add cabbage for a nutritious and crunchy dish.

    Key Takeaways

    • Saute onions and garlic for aromatic base and enhanced flavor.
    • Cook chicken with seasonings for protein boost and flavor enhancement.
    • Use bone-in chicken and Knorr Chicken Cube for rich taste.
    • Incorporate cabbage for nutrients and crunch, garnish with spring onions.

    Prep Ingredients

    To ensure efficient cooking, thinly slice the cabbage, cut the chicken into thin pieces, finely mince the garlic, and chop the onion small before starting to cook Ginisang Repolyo with Chicken.

    The thinly sliced cabbage will cook quickly and evenly, while cutting the chicken into thin pieces ensures a faster cooking time.

    Finely minced garlic releases its flavor into the dish, enhancing the overall taste. By chopping the onion into small pieces, it will blend seamlessly with the chicken, cabbage, and garlic during the cooking process.

    Having all these ingredients prepared and ready beforehand will streamline your cooking experience and result in a delicious Ginisang Repolyo with Chicken dish.

    Saute Onions and Garlic

    Saute the onions and garlic in oil to enhance the flavor base of your Ginisang Repolyo with Chicken dish. Here are some tips to make the most out of this step:

    1. Heat oil in a pan until shimmering before adding the onions and garlic.
    2. Stir the onions and garlic frequently to prevent burning and ensure even cooking.
    3. Cook until the onions are translucent and the garlic is fragrant to bring out their full flavor.
    4. The aromatic elements released during sauteing will provide a flavorful foundation for the rest of your dish.

    Add Chicken and Seasonings

    Now it’s time to amp up the protein content by adding the sliced chicken to the mix. Season your chicken and veggies with salt, pepper, and maybe a touch of soy sauce for that savory kick.

    Make sure to cook the chicken until it’s slightly browned to really enhance the dish’s flavors.

    Chicken Preparation Tips

    When thinly slicing the chicken, remember to season it with salt and pepper to enhance its flavor. Here are some chicken preparation tips to help you make the most delicious Ginisang Repolyo:

    1. Slice Thinly: Ensure the chicken is thinly sliced for quick and even cooking.
    2. Season Well: Don’t forget to season the chicken with salt and pepper to add depth to the dish.
    3. Use Bone-in Chicken: Opt for bone-in chicken when boiling for a richer taste experience.
    4. Add Knorr Chicken Cube: Incorporate Knorr Chicken Cube in the boiling water for an extra boost of savory chicken flavor.

    Seasoning Choices

    For enhanced flavor, season the thinly sliced chicken with salt and pepper before incorporating it into the sauteed garlic and onion mixture.

    As the dish cooks, consider adding a Knorr Chicken Cube for an extra boost of savory taste.

    To enhance the umami profile, soy sauce can be a great seasoning choice for Ginisang Repolyo with Chicken.

    Remember to adjust the seasoning according to your preference to achieve the desired taste. Be cautious with salt levels since soy sauce already contributes saltiness.

    Balancing the flavors carefully will ensure a delicious outcome. Experiment with these seasoning choices to find the perfect blend that suits your palate.

    Cook Chicken Until Browned

    Slice the chicken thinly for quick cooking and even browning.

    Saute it in hot oil until it reaches a slight golden brown color.

    Browning the chicken will enhance the flavor and texture of your dish.

    Browning Chicken Evenly

    To achieve even browning on your chicken, ensure the pan is hot before adding the slices to prevent sticking. Here are some tips to help you achieve perfectly browned chicken:

    1. Slice Thinly: Cutting the chicken thinly helps it cook faster and ensures even browning on all sides.
    2. Cook Until Golden Brown: Aim to cook the chicken until it reaches a golden brown color, indicating caramelization for enhanced flavor.
    3. Turn Occasionally: Flip the chicken pieces occasionally while cooking to achieve uniform browning and avoid burning.
    4. Enhance Flavor: Properly browned chicken not only adds depth of flavor to your dish but also enhances its overall presentation.

    Achieving Golden Brown

    Achieve a perfect golden brown hue on your chicken by ensuring it’s cooked until uniformly browned on all sides. Browning the chicken not only enhances its flavor but also adds a delightful texture to your dish.

    When you cook the chicken until it turns golden brown, you’re allowing the Maillard reaction to take place. This reaction is responsible for creating those rich and complex flavors that make your ginisang repolyo with chicken so delicious.

    Additionally, achieving a golden brown color helps seal in the juices of the chicken, ensuring a moist and flavorful outcome. Remember, the visual appeal of perfectly browned chicken adds an extra touch of sophistication to your dish.

    Incorporate Cabbage

    Consider adding chopped cabbage to your Ginisang Repolyo with Chicken for a delightful crunch and added nutrients. Cabbage, a staple in Filipino food, is rich in vitamin C and low in saturated fat, making it a healthy choice for your meal.

    Here are four reasons why incorporating cabbage into your dish is a great idea:

    1. Nutrient Boost: Cabbage is packed with essential nutrients like vitamin C, which can help support your immune system.
    2. Texture Enhancement: The crunchy texture of cabbage adds a pleasant contrast to the soft chicken and enhances the overall dining experience.
    3. Flavor Infusion: Cabbage absorbs the flavors of the dish while imparting its own subtle sweetness, elevating the taste profile.
    4. Health Benefits: The potential health benefits of cabbage, including anti-inflammatory properties and digestive support, can complement the nutritious elements of your meal.

    Stir Fry Cabbage

    Enhance your dish by stir-frying cabbage to retain its crunchiness and vibrant color while infusing it with savory flavors from the chicken. Stir-frying cabbage is a quick and easy way to prepare this versatile vegetable, especially in Filipino cuisine. Below is a simple table showing the benefits of stir-frying cabbage:

    Benefits of Stir-Frying Cabbage
    Retains crunchiness
    Preserves vibrant color
    Infuses with savory flavors

    Stir-frying cabbage not only keeps it nutritious but also adds a delightful texture to your dish. This method is perfect for those looking to create a delicious and healthy meal in a short amount of time.

    Add Water and Simmer

    To continue cooking your Ginisang Repolyo with Chicken, the next step is to add water to the pan and simmer the ingredients together. Here’s what you need to do:

    1. Add enough water to cover the ingredients in the pan for proper cooking.
    2. Simmer the cabbage and chicken mixture over medium heat to allow flavors to meld.
    3. Adjust the water level if needed to prevent the dish from drying out.
    4. Simmering helps to soften the cabbage and ensures the chicken is fully cooked.

    Season to Taste

    Season your Ginisang Repolyo with Chicken to taste by adjusting the salt and pepper levels according to your preference. For an extra depth of flavor in this Filipino dish, consider incorporating soy sauce, but be cautious with the salt content as soy sauce already contributes sodium.

    Throughout the cooking process, remember to taste and tweak the seasoning to achieve the desired taste profile. Garnishing your Ginisang Repolyo with Chicken with chopped spring onions not only enhances its presentation but also adds a fresh taste to the dish.

    Serve Hot

    When serving Ginisang Repolyo with Chicken, ensure it’s piping hot to preserve its delightful flavors and textures.

    Here are some tips to make sure you serve this dish at its best:

    1. Immediate Serving: Serve the Ginisang Repolyo with Chicken as soon as it’s ready to maintain the heat.
    2. Use Warm Plates: Warm up your plates before serving to keep the dish hot for longer.
    3. Cover When Needed: If you need to wait before serving, cover the dish to retain its heat.
    4. Reheat if Necessary: If the dish cools down, reheat it gently to bring back the flavors and warmth.

    Can I Use Chicken Instead of Pork in the Kangkong Oyster Sauce Stir-Fry Recipe?

    Yes, you can use chicken instead of pork in the kangkong oyster sauce stir-fry recipe. Simply substitute the pork with an equal amount of diced chicken thigh or breast. Follow this quick kangkong stir-fry tutorial and enjoy a delicious and versatile meal with your preferred protein.

    Garnish and Enjoy

    Garnish your Ginisang Repolyo with Chicken to elevate its look and taste.

    Sprinkle chopped spring onions or parsley for a burst of freshness.

    A squeeze of calamansi or lemon juice, plus a drizzle of soy sauce, will bring out the dish’s flavors.

    Plating Tips

    For a vibrant finishing touch to your Ginisang Repolyo with Chicken, consider adding a sprinkle of freshly chopped spring onions and toasted garlic. Here are some plating tips to elevate your dish:

    1. Garnish Creatively: Arrange the spring onions in a decorative pattern on top of the dish.
    2. Crunchy Goodness: Sprinkle the toasted garlic around the edges of the plate for a delightful crunch in every bite.
    3. Authentic Presentation: Serve the Ginisang Repolyo with Chicken on a traditional Filipino wooden plate or on a banana leaf for an authentic touch.
    4. Pairing Perfection: Don’t forget to serve it with a side of steamed white rice to complement the flavors perfectly.

    Remember to take a photo and tag us on Instagram for some plating tips sure to impress your followers!

    Flavor Pairing

    Enhance the vibrant flavors of Ginisang Repolyo with Chicken by adding a squeeze of calamansi or lemon juice for a delightful citrusy twist. The Filipino dish can be elevated further by garnishing it with chopped spring onions, adding freshness and color to the meal.

    To fully enjoy the flavors and textures of the sauteed cabbage and chicken, serve the dish hot. Pairing this easy-to-make Filipino food with a side of steamed rice completes the meal, offering a satisfying dining experience.

    For variety in presentation and flavor, consider experimenting with different garnishes such as toasted garlic or fried shallots. By incorporating these flavor pairings, you can create a delightful and delicious dining experience with Ginisang Repolyo with Chicken.

    Frequently Asked Questions

    How to Cook Chicken for Beginners?

    To cook chicken for beginners, season thinly sliced chicken with salt and pepper. Brown it in a pan without overcrowding for even cooking. Use bone-in chicken for extra flavor. Cook until done. Enjoy your tasty dish!

    How to Cook Chicken in Bulk?

    To cook chicken in bulk, trim and season it first. Use a large pot or slow cooker for efficiency. Consider a pressure cooker for faster cooking. When done, portion it out for easy meals all week.

    Conclusion

    Enjoy the delicious and nutritious Ginisang Repolyo with Chicken by following these 10 easy steps.

    With simple ingredients and quick cooking time, this Filipino dish is perfect for a satisfying meal.

    Experiment with different variations to suit your taste preferences and add extra color and nutrients.

    Serve hot with steamed rice for a flavorful and complete dining experience.

    Try making this dish today and impress your family and friends with your cooking skills!

  • Step-by-Step Instructions for Gising-Gising Cooking

    Step-by-Step Instructions for Gising-Gising Cooking

    Prepare Gising-Gising by sautéing garlic, shallots, and chili peppers for flavor. Enhance the dish with green beans cooked in coconut milk for a delicious meal.

    Key Takeaways

    • Prepare green beans with ground pork and coconut milk for a flavorful dish.
    • Adjust spiciness with green chilies and experiment with different peppers for varied heat levels.
    • Serve hot with rice and accompaniments like fried fish or pickled vegetables.
    • Store leftovers properly, reheating gently to preserve flavor and texture.

    Preparing the Ingredients

    Are you ready to gather all the ingredients needed for making Gising-Gising?

    For this Filipino dish, you’ll need to slice 500g of green beans and prepare 300g of ground pork with 30% fat content.

    Don’t forget to have 2 tbsp of shrimp paste, 2 cups of coconut milk, and 1 cup of coconut cream at hand. These ingredients will give your dish its authentic flavor.

    Make sure to chop 45 pieces of red chilies, mince 4 cloves of garlic, and finely chop 2 small shallots for the recipe.

    Once you have everything ready, you’ll be all set to start creating this delicious Gising-Gising dish.

    Sautéing the Aromatics

    Heat some oil in a pan over medium heat to start sautéing the garlic and shallots.

    As they cook, their fragrance will fill your kitchen and add depth to the dish.

    Heat Oil in Pan

    Before beginning the sautéing process for your Gising-Gising dish, heat up a pan with neutral oil over medium heat.

    • Use a neutral oil like vegetable or canola oil for sautéing the aromatics.
    • Allow the oil to heat up before adding the garlic and onions to prevent them from burning.
    • Sautéing the aromatics releases their flavors and creates a flavorful base for the Gising-Gising dish.
    • Stir the aromatics frequently to prevent them from sticking to the pan and ensure even cooking.
    • Cooking the aromatics properly is crucial as it sets the foundation for the overall taste of your Gising-Gising dish.

    Sauté Garlic and Onions

    Start by sautéing the garlic and shallots in a wok until fragrant and translucent. This process is essential as the aromatics form a flavorful base for your Gising-Gising dish. Sautéing the garlic and shallots in oil allows their natural oils to be released, enhancing the overall taste.

    The heat helps develop their sweetness and complexity, enriching the dish. Properly cooked garlic and onions bring depth and richness to your creation. Ensure you stir them continuously to prevent burning and achieve an even cook. Once they’re fragrant and translucent, you’re ready to move on to the next step of adding chili peppers to elevate the dish further.

    Add Chili Peppers

    When infusing your Gising-Gising with a fiery kick, remember that the chili peppers play a crucial role in enhancing both the heat and flavor profile of the dish. Here are some key points to consider when adding chili peppers:

    • Sautéing the chili peppers releases their oils and intensifies their heat.
    • The type of chili pepper used can affect the spiciness level of the dish.
    • Adjust the amount of chili peppers based on your preference for spiciness.
    • Removing the seeds and veins of the chili peppers can reduce the heat level in the dish.

    Adding the Green Beans

    Now it’s time to add the green beans to your Gising-Gising. Prep the beans by trimming the ends and cutting them into bite-sized pieces.

    Cook them in the coconut milk mixture until tender yet slightly crisp for that perfect texture.

    Preparing the Beans

    Slice the green beans into bite-sized pieces to enhance their texture and color in the dish, ensuring they cook evenly in the flavorful coconut milk sauce.

    • Enhancing Texture: Cutting the green beans helps them retain a slight crunch.
    • Vibrant Appearance: Green beans contribute to the colorful presentation of the dish.
    • Proper Cooking Time: Cooking the beans for 5 to 7 minutes ensures they’re tender yet slightly crisp.
    • Nutritional Value: Green beans are rich in Vitamin C and essential minerals.
    • Even Coating: Stir the green beans gradually to coat them thoroughly with the spicy coconut milk sauce.

    Cooking With Coconut Milk

    Enhancing the coconut milk sauce with green beans adds a delightful crunch and nutritional boost to your gising-gising dish. As the green beans simmer alongside the pork in the rich coconut milk, they absorb the flavors, creating a harmonious blend of tastes. Green beans are not only known for their crunchy texture but also for being a great source of vitamins and minerals, enhancing the overall nutritional value of the dish.

    Cooking the green beans for 5 to 7 minutes ensures they maintain their vibrant color and crispness. Remember to stir them gently to evenly distribute the flavors. Below is a table summarizing the key points of cooking with coconut milk and green beans:

    Key Points Cooking With Coconut Milk and Green Beans
    Flavor Absorption Green beans absorb the rich coconut milk flavors.
    Nutritional Value Green beans add vitamins and minerals to the dish.
    Cooking Time Cook green beans for 5 to 7 minutes for optimal texture.
    Stirring Technique Stir gently for even cooking and flavor distribution.

    Incorporating the Coconut Milk

    Incorporate the coconut milk gradually into the gising-gising mixture, stirring gently to ensure it blends smoothly with the other ingredients.

    • Gently pour the coconut milk into the pot
    • Stir the mixture continuously to prevent clumping
    • Allow the coconut milk to simmer and infuse its flavor
    • Notice the aroma of the coconut milk as it combines with the ingredients
    • Ensure the coconut milk creates a creamy texture in the dish

    Seasoning With Spices

    Wondering how to infuse your Gising-Gising with a perfect blend of spices for that ultimate kick of flavor? When seasoning your dish, consider using ground black pepper, shrimp paste, and green chilies to achieve a spicy flavor profile. The shrimp paste adds a savory umami taste, while the green chilies bring heat and a distinctive flavor to the dish. Balancing these spices is key to reaching the desired level of spiciness and enhancing the overall flavor profile.

    Check out the table below for a quick reference on the essential spices for your Gising-Gising:

    Spice Role
    Ground Black Pepper Adds spiciness
    Shrimp Paste Provides umami taste
    Green Chilies Brings heat and flavor

    Ensure a harmonious blend of these spices to elevate the taste and aroma of your Gising-Gising.

    Simmering to Perfection

    To perfect your Gising-Gising, ensure that the coconut milk, pork, and seasonings simmer together to allow the flavors to meld harmoniously.

    • Simmering: Cook the ingredients gently in the coconut milk mixture.
    • Tenderize: Let the pork and green beans soften as they simmer.
    • Flavors: Allow the seasonings to infuse and enhance the dish.
    • Consistency: Monitor the simmering process to achieve the desired thickness.
    • Gising-Gising: Ensure all components are simmered well to create a delicious dish.

    Adjusting the Heat Level

    Adjust the spiciness of your Gising-Gising by modifying the quantity of green chilies included in the recipe. For a milder flavor, remove the seeds and veins from the chili peppers. If you prefer a hotter kick, increase the number of chili peppers in the dish.

    Experiment with different types of chili peppers to customize the spiciness according to your liking. By controlling the amount of chili peppers, you can tailor the dish to suit your taste buds perfectly.

    How Does Sigarilyas Change the Flavor of Gising-Gising?

    When preparing Gising-Gising, adding sigarilyas can transform the flavor and texture of the dish. The ultimate sigarilyasgisinggising cooking guide will show you how to balance the nutty and slightly bitter taste of sigarilyas with the creamy and spicy coconut milk base of the dish.

    Serving and Enjoying Gising-Gising

    To savor your Gising-Gising to the fullest, consider pairing it with steamed white rice and tinapa for a satisfying meal experience. Enjoy it as a main dish or as a flavorful side dish alongside grilled meat or fish. If you have leftovers, store them in an airtight container in the refrigerator for up to 3 days. Reheat the leftovers gently to an internal temperature of 165°F for safety and quality.

    Gising-Gising also pairs well with other Filipino dishes, creating a delicious and satisfying meal combination.

    • Serve with steamed white rice and tinapa
    • Enjoy as a main dish or side dish
    • Store leftovers in the refrigerator
    • Reheat gently to 165°F
    • Pair with other Filipino dishes

    Frequently Asked Questions

    Ano Ang Pwedeng Kapalit Ng Sigarilyas?

    You can substitute sigarilyas with green beans, string beans, or water spinach in Gising-Gising. Green beans match the texture and taste well. String beans offer a different flavor. Water spinach, or kangkong, adds a unique twist. Experimenting with veggies lets you personalize the dish.

    How Do You Clean Winged Beans?

    To clean winged beans, rinse them under cold water, trim the ends with a knife, peel tough strings with a peeler, and cut into pieces. Now they’re ready for your Gising-Gising dish. Enjoy cooking!

    Conclusion

    Now that you’ve followed these simple steps for cooking Gising-Gising, you’re ready to enjoy this delicious and spicy Filipino dish.

    Experiment with different ingredients and spice levels to make it your own.

    Serve it with rice for a satisfying meal that will surely delight your taste buds.

    Happy cooking and enjoy your Gising-Gising!